


5-5 User Guide for AIR-104/AIR-204
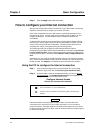
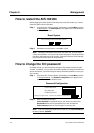
the clock is set. If you select "No", then Internet access will not be allowed until the clock
is set.
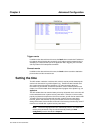
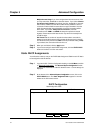
Step 4 Click on the
Apply
button with the mouse when you are finished.
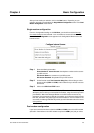
Advanced System Configuration
The Advanced System Configuration utility allows you to fine-tune the AIR-104/204’s
handling of shared Internet access.
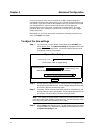
The most basic function provided by this utility is to set the
Idle Timeout
, i.e. how long the
primary ISP connection from the
COM1
port (or the built-in V.90 modem of the AIR-204)
should be allowed to remain idle before the AIR-104/204 disconnects it.
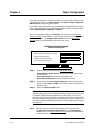
The
Multiple Account Usage
area lets you enable or disable the “bandwidth on demand”
feature, which causes a second Internet Account to be established or terminated
automatically in response to changing demand for Internet access.
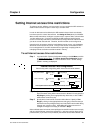
You may also modify the AIR-104/204’s
Private IP Address
, if you wish, to assign it to a
different IP subnet, or to avoid any conflict caused by two network devices sharing the
same private IP address. If you change the router’s IP subnet (the third section of the
four-part IP address) from the default value of 168, then all new DHCP assignments will
use this new subnet value.
You may specify
Primary
and
Secondary DNS IP Addresses
to be used for Internet
access. Normally, the AIR-104/204 will acquire from your ISP the IP addresses of primary
and secondary Domain Name Servers (DNS) that translate website or other Internet
names into IP addresses. You may instead configure the AIR-104/204 to assign others of
your own choosing.
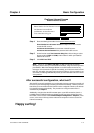
Finally, you may enable
DHCP
, causing your AIR-104/204 to provide IP addresses to
your network PC’s, or disable DHCP if you wish to set IP addresses mamually (DHCP is
enabled by default). Also, you may select
Static DHCP
for any of your network PC’s,
which causes that PC always to receive the same IP address (this may be necessary for
certain network applications). The AIR-104/204 supports up to 20 such static DHCP
assignments.
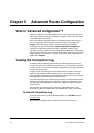
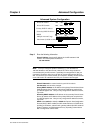
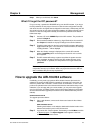
To set advanced configuration options
Step 1 Log onto the ICC. Find the Configuration heading on the
ICC Menu
, and click
on Advanced Configuration
. The
Advanced System Configuration
window
appears in the main window of the ICC browser screen. Current settings are
displayed.
Chapter 5 Advanced Configuration