


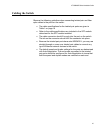

Chapter 2: Installation
40
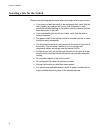
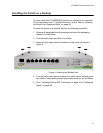
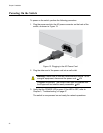
Installing the Switch on a Wall
To install the switch on a wall, perform the following procedure:
1. Turn the switch over and place it on a table.
2. If the rubber feet are attached to the bottom of the switch, remove
them using a flat-head screwdriver.
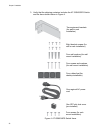
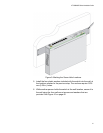
3. Orient the brackets against the sides of the switch as shown in
Figure 8, and secure them to the unit with the eight bracket screws
included with the switch.
Figure 8. Attaching the Brackets to Install the Switch on a Wall
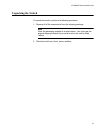
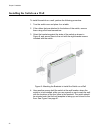
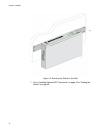
4. Have another person hold the switch at the wall location where the
switch is to be installed, while you use a pencil or pen to mark the wall
with the locations of the four holes in the brackets. The switch should
be oriented such that its front faceplate is facing up and is level to the
floor. See Figure 9 on page 41.