


Page 4 | AlliedWare™ OS How To Note: VPNs with NetScreen routers
How to configure the Allied Telesis router
Before you
start
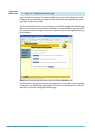
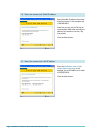
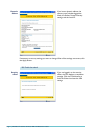
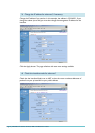
1. Access the router via its GUI.
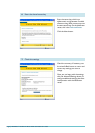
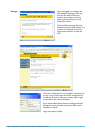
2. Customise the router and set up vlan
1
as the LAN interface. The site-to-site VPN wizard
always uses vlan
1
as the local LAN for the VPN connection, so you must make sure an IP
interface is configured on vlan
1
before running the wizard.
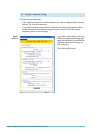
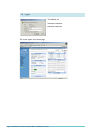
3. Create a security officer. If you use the Basic Setup wizard to customise the router, this
creates one security officer, with a username of “secoff”.
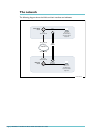
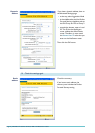
4. Set up the WAN interface appropriately for your connection type. This example shows
the steps for both a fixed IP address on the WAN interface (as in the figure above) and a
PPPoE interface with a dynamically-assigned address.
The router setup of steps
1
-4 is described in How To Use the Allied Telesis GUI to Customise the
Router and Set Up An Internet Connection, which is available from www.alliedtelesis.com/
resources/literature/howto.aspx.
In this example, the Allied Telesis router has the following settings:
Interface Address Mask
Allied Telesis router LAN vlan
11
92.
1
68.
1
.
1
255.255.255.0
Allied Telesis router WAN:
if fixed IP address eth0
1
00.
1
00.
1
00.
1
255.255.255.252
if dynamic IP address ppp0 0.0.0.0 0.0.0.0
Remote site’s WAN settings 200.200.200.
1
Remote site’s LAN settings
1
92.
1
68.2.1 255.255.255.0