BreezeNET DS.11 Series User Manual
3-4
Control Window
The following sections describe how to work with the Control Window.
Selecting Units
You can select a unit to manage in one of the following ways:
♦ Click the Network Autodiscovery button. All the IP addresses of units in the
same domain but not hidden behind a router (under the selected community)
are displayed in the list box underneath the button. Click on an address to
select the corresponding unit for viewing and configuration.
♦ Type the unit's IP address in the Locate Unit field (for stations which are
located behind a router) and click
. This will add the unit information to the
selection list.
Setting the SNMP Community String
Type the known Read/Write Community string in the Community field (the default
string is public for read and private for read/write) and click the
button to
confirm.
Assigning and Editing IP Addresses Manually (based on
MAC addresses)
This section describes how to manually input or modify the IP address of the
selected unit.
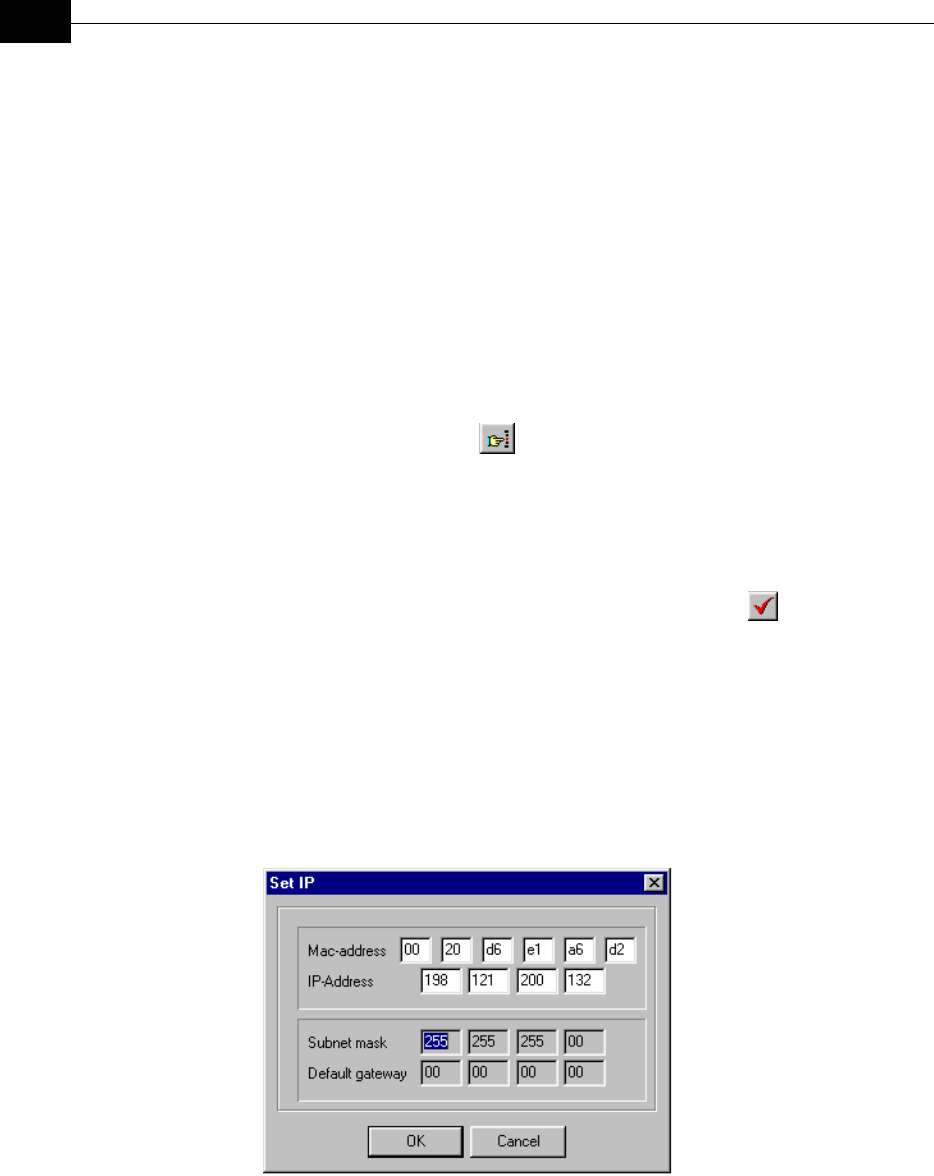
1. Click the Set IP button. The Set IP dialog box appears.
Figure
3-2: The Set IP Dialog Box
2. Type the parameters in the appropriate fields and click OK; the MAC address
is shown on the bottom label of the indoor and outdoor units. A message box
is displayed notifying you when the changes are to take affect. This feature
can be used only if the DS.11 Configuration Utility is on the same Ethernet
segment as the unit and not behind a router.


