


Rack Assembly
18 Battery Rack Assembly and Installation Manual
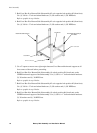
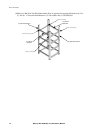
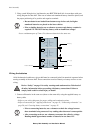
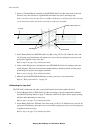
3. Using a rated lifting device, load batteries onto BOTTOM shelf rails in accordance with your
wiring diagram for that shelf. Take note of where each numbered battery should be placed, and
the proper positioning of its positive and negative terminals.
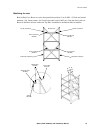
Leave a minimum space of 5 mm (.2 in) between batteries in the same row.
Wiring the batteries
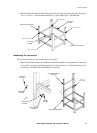
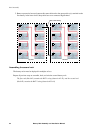
All of the batteries loaded onto a given shelf must be connected (wired) in numerical sequence before
starting assembly of the next shelf. These connections consist of battery-to-battery and row-to-row
wiring.
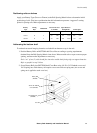
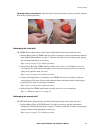
1. Connect all batteries in the same row (those on the same rails) using the supplied battery-to-
battery cable.
– Refer to your wiring diagrams for proper cabling and termination points.
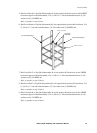
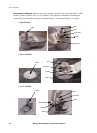
– Refer to instructions for “Applying cable boots” on page 19, “Connecting to batteries” on
page 20, and “Covering battery connections” on page 21.
Note
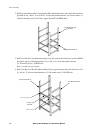
• Because batteries are loaded from bottom-to-top in the rack, the higher-
numbered batteries are placed on the lower shelves.
• Prior to loading batteries, use a voltmeter to ensure each battery contains its
required 12V. DO NOT load any battery with an insufficient voltage!
Positive Terminal Negative Terminal
5 mm [.2]
5 mm [.2]
28
27
26
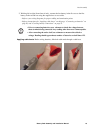
Warning
Review “Safety” on page 1 for safety warnings and caution notices. Take heed of
all safety information before proceeding with battery connections. Failure to
comply could result in serious injury or death!
Note
• Prior to connecting batteries, use a voltmeter to check the voltage between
those terminals being connected. Any reading other than zero is unacceptable.
• After connecting each row, use voltmeter to measure the collective voltage.
Reading should approximate number of batteries in row times 12V.