


Configuration and Firmware Update
43
NetLinx Integrated Controllers
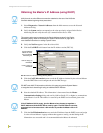
8. Click OK to accept the new changes.
9. Click the Reboot Master button and select Yes to close the Network Address dialog.
10. Click Reboot (from the Tools > Reboot the Master Controller dialog) and wait for the System
Master to reboot and retain the newly obtained DHCP Address. The STATUS and OUTPUT
LEDs should begin to alternately blink during the incorporation. Wait until the STATUS LED
is the only LED to blink.
11. Press Done once the Master Reboot Status field reads Reboot of System Complete.
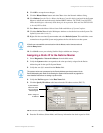
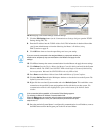
12. Click the OnLine Tree tab in the Workspace window to view the devices on the System. The
default System value is one (1).
13. Right-click the associated System number and select Refresh System. This establishes a new
connection to the specified System and populates the list with devices on that system.
14. Use Ctrl+S to save your existing NetLinx Project with the new changes.
Assigning a Static IP to the NetLinx Master
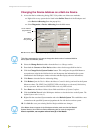
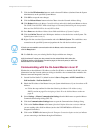
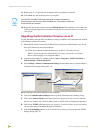
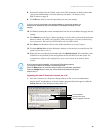
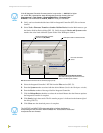
1. Select Diagnostics > Network Addresses from the Main menu.
2. Verify the System number corresponds to the value previously assigned in the Device
Addressing tab for the specific System Master.
3. Verify that zero (0) is entered into the Device field.
4. Verify that NetLinx appears in the Host Name field.
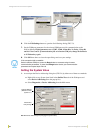
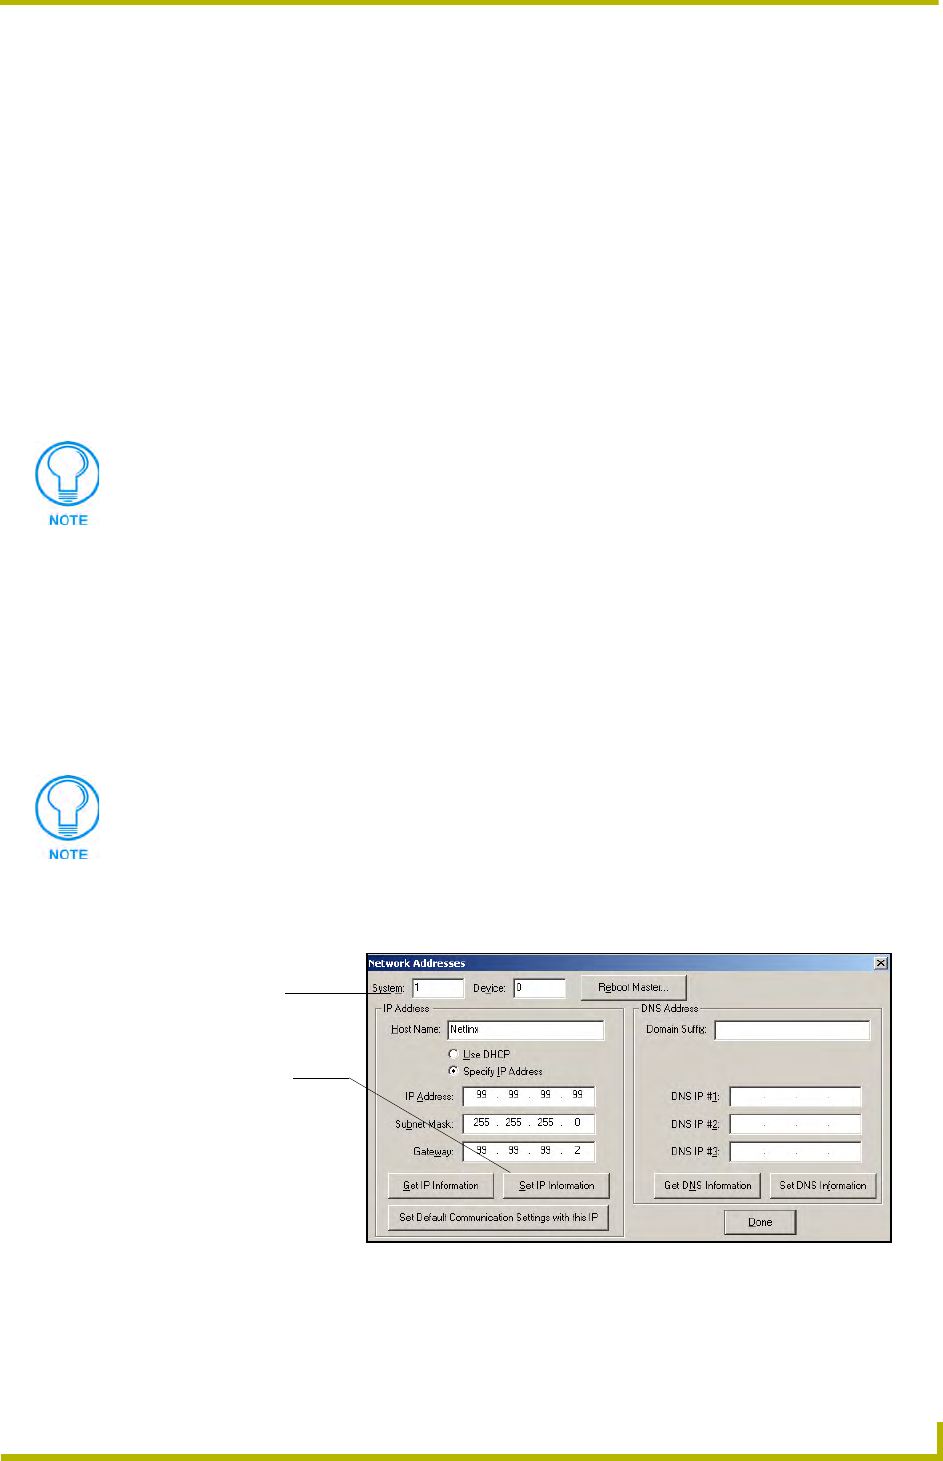
5. Click the Specify IP Address radio button from the IP Address section (FIG. 27).
6. Enter the IP Address, Subnet Mask, and Gateway information into their respective fields.
If Studio can not establish communication with the Master, wait a few seconds and
click the Retry button.
The system value must correspond to the Device Address previously entered in the
Device Addressing tab. Refer to the Setting the System Value section on page 38 for
more detailed instructions on setting a system value.
FIG. 27 Network Addresses dialog (showing Set IP)
System Address
reflects the value
set in the Device
Addressing tab
Used to assign an
IP Address