


Configuration and Firmware Update
48
NetLinx Integrated Controllers
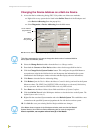
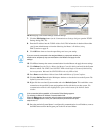
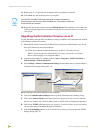
11. Repeat steps 8 - 11 again (the last component will successfully be installed).
12. Click Close once the download process is complete.
13. Right-click the System number and select Refresh System. This establishes a new connection
to the System and populates the list with the current devices (and their firmware versions) on
your system.
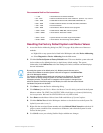
Upgrading the NI Controller Firmware via an IP
Use the information from the Network Addresses dialog to establish a new communication method
to the Ethernet-connected Controller.
1. Obtain the IP Address of the on-board Master from your System Administrator if you do not
have an IP Address for the on-board Master:
Follow steps outlined in either the Obtaining the Master’s IP Address (using
DHCP) section on page 42 to obtain the IP or Assigning a Static IP to the NetLinx
Master section on page 43 to assign the address.
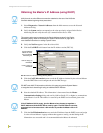
2. Launch NetLinx Studio 2.2 (default location is Start > Programs > AMX Control Disc >
NetLinx Studio > NetLinx Studio 2.2).
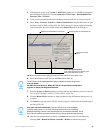
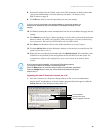
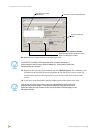
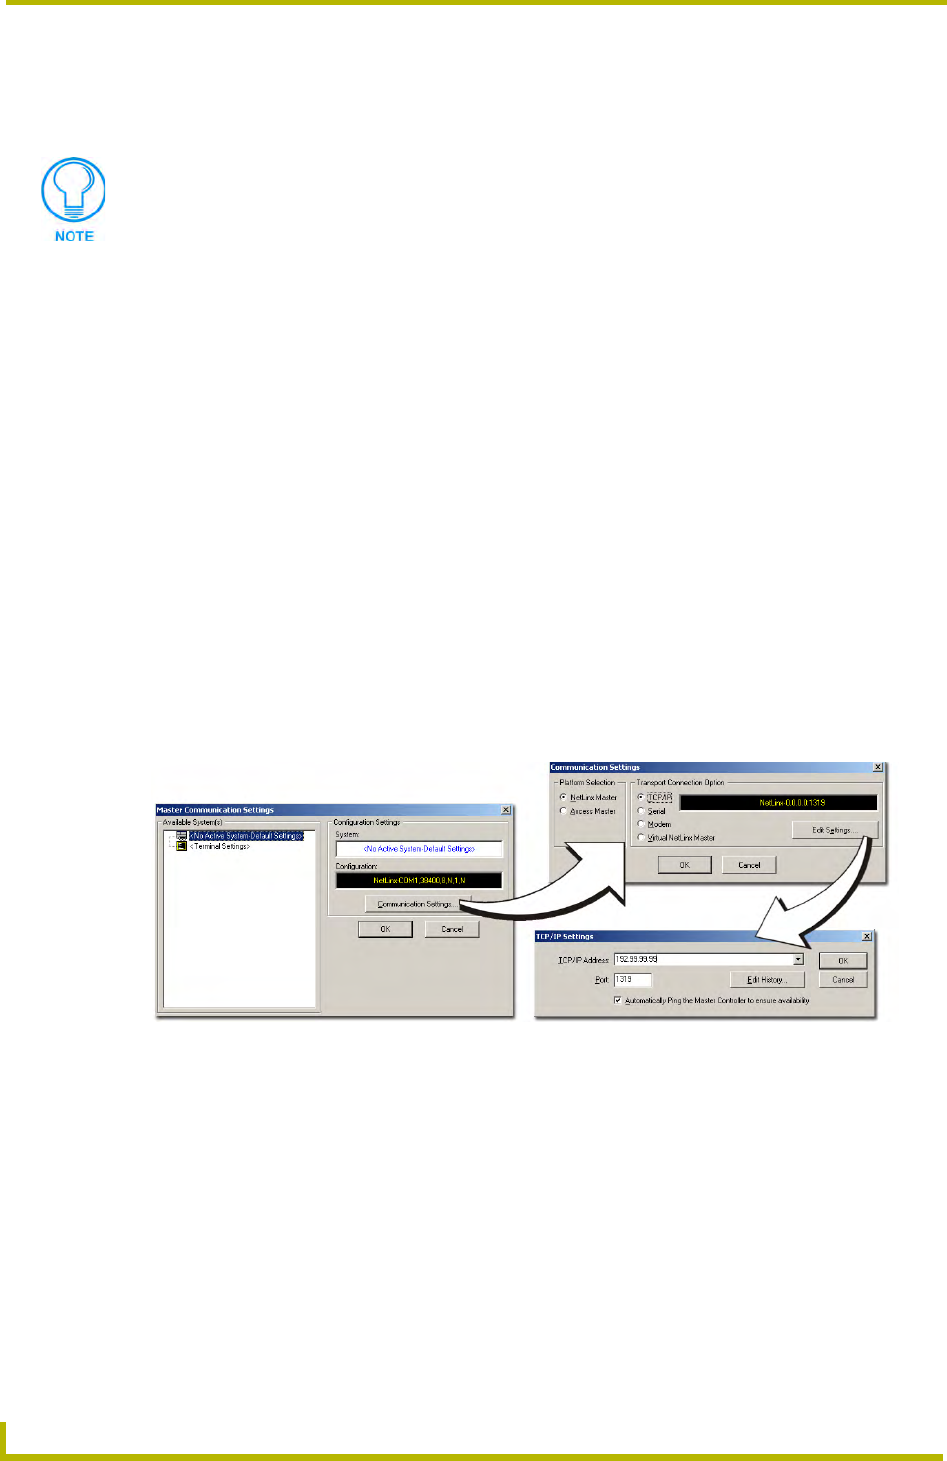
3. Select Settings > Master Communication Settings from the Main menu to open the Master
Communication Settings dialog (FIG. 31).
4. Click the Communications Settings button to open the Communications Settings dialog.
5. Click on the NetLinx Master radio button (from the Platform Selection section) to indicate
that you are working with a NetLinx Master (such as the NI-Series of Integrated Controllers).
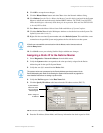
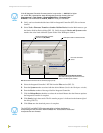
6. Click on the TCP/IP radio button (from the Transport Connection Option section) to indicate
you are connecting to the Master through an IP Address.
7. Click the Edit Settings button (on the Communications Settings dialog) to open the TCP/IP
Settings dialog (FIG. 31).
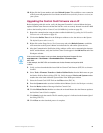
The OUTPUT and INPUT LEDs alternately blink to indicate the Master is
incorporating the new firmware. Allow the Master 20 - 30 seconds to reboot and
incorporate the new firmware.
FIG. 31 Assigning Communication Settings and TCP/IP Settings