


Installation
Page 2-10
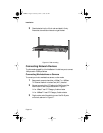
Stacking Hubs
Up to eight NetStacker II hubs may be connected within a stack. Furthermore,
a management module can be installed easily in any of the stacked hubs, so that
all of them can be managed. The management module communicates with a
manager console by means of SNMP agent software, installed in the managed
hub. This reduces considerably the expense of equipping each hub for
management.
It is not necessary to configure a Hub ID for each NetStacker II hub in a stack.
The auto-configure feature takes care of this for you.
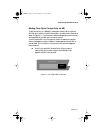
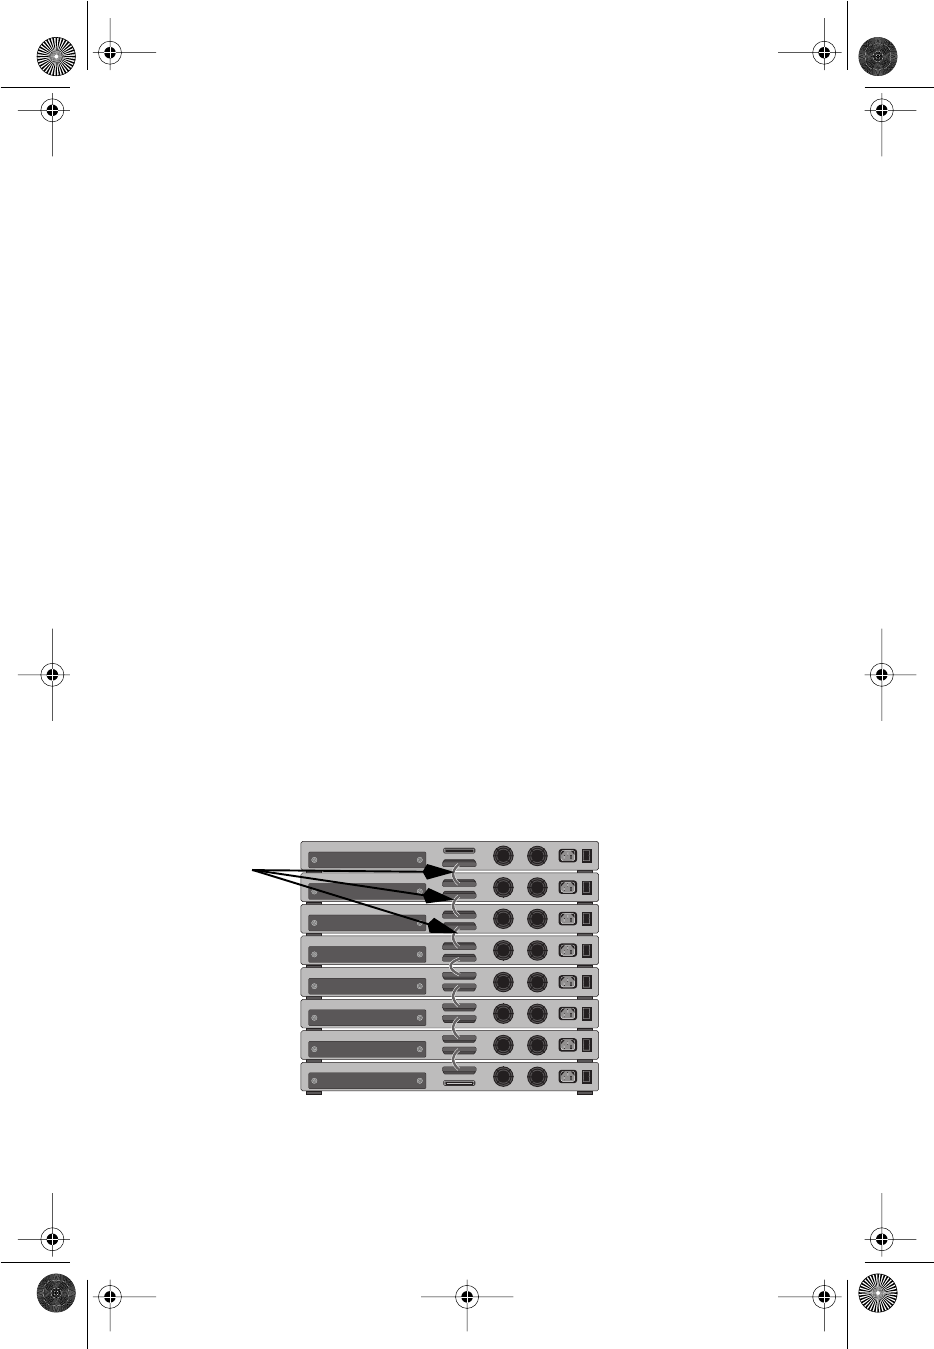
1 Check the 50-pin “stacking” cable that was included in
the package with your NetStacker II hub. It is designed
specifically for stacking your unit with others of the same
design.
◆ Note: Do not use any cable but the NetStacker II stack-
ing cable supplied with your unit; if you need additional
cables, contact Asanté support.
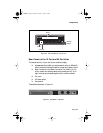
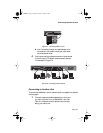
2 Place the hubs in a stack so the rear panels are aligned as
shown in Figure 2-10.
3 Connect the “Stack Connection Out” on the upper hub
with the “Stack Connection In” of the hub below it. Leave
the “Stack Connection In” of the uppermost hub and the
“Stack Connection Out” of the lowermost hub uncon-
nected, as shown in Figure 2-10.
Figure 2-10 Stacking NetStacker II hubs
Stacking
Cables
Stack Connection In
Stack Connection Out
Management Module Slot
100–240Vac Off
On
Stack Connection In
Stack Connection Out
Management Module Slot
100–240Vac Off
On
Stack Connection In
Stack Connection Out
Management Module Slot
100–240Vac Off
On
Stack Connection In
Stack Connection Out
Management Module Slot
100–240Vac Off
On
Stack Connection In
Stack Connection Out
Management Module Slot
100–240Vac Off
On
Stack Connection In
Stack Connection Out
Management Module Slot
100–240Vac Off
On
Stack Connection In
Stack Connection Out
Management Module Slot
100–240Vac Off
On
Stack Connection In
Stack Connection Out
Management Module Slot
100–240Vac Off
On
SHBBook Page 10 Wednesday, March 3, 1999 8:03 PM