


2-122-12
2-122-12
2-12
Chapter 2: InstallationChapter 2: Installation
Chapter 2: InstallationChapter 2: Installation
Chapter 2: Installation
When finished, the utility returns to the DOS prompt.
Make sure that the assigned IP address for both remote and local/central
servers are in the same subnet. You can use the network settings utility
in your OS to check.
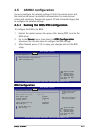
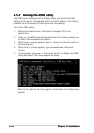
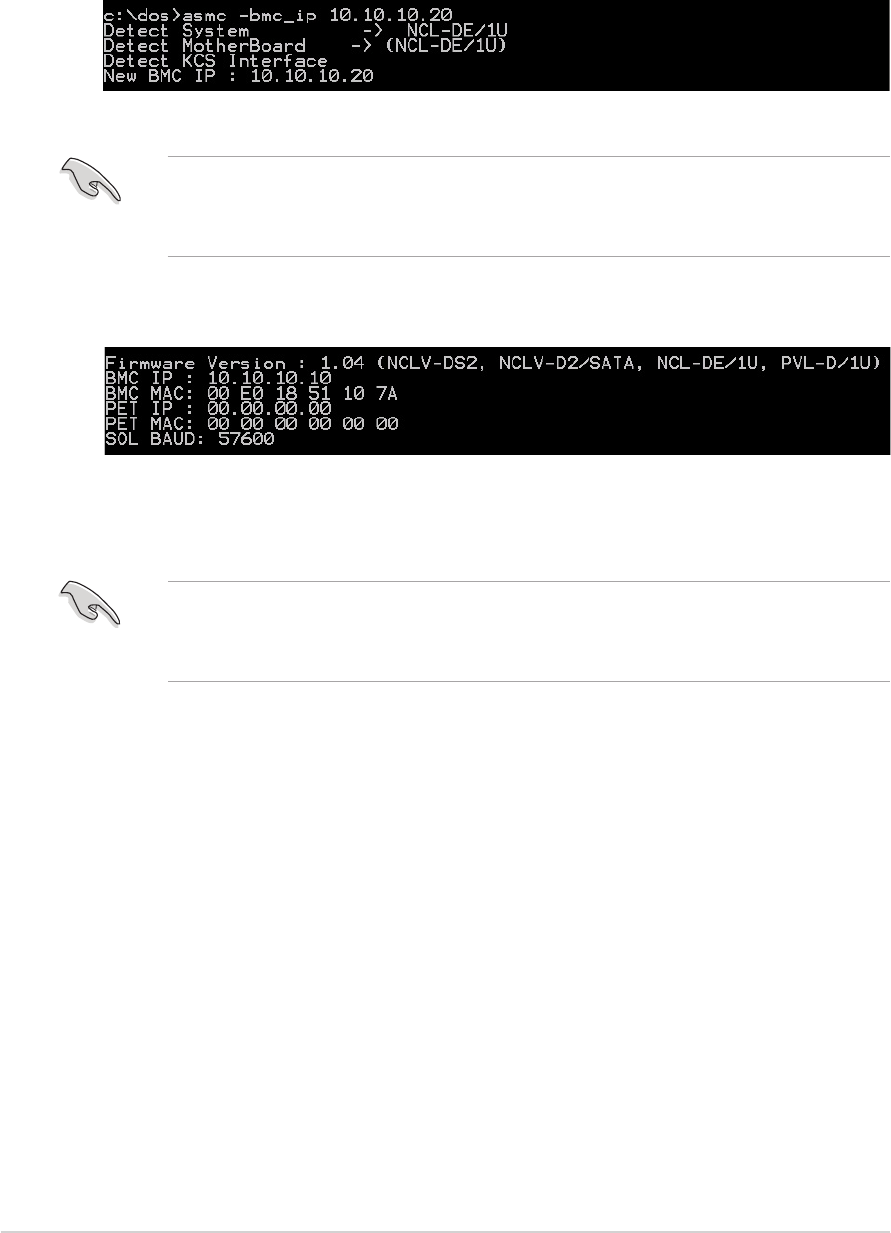
6. Type
asmc -bmc_info asmc -bmc_info
asmc -bmc_info asmc -bmc_info
asmc -bmc_info on the prompt, then press <Enter> to
display the BMC and PET IP and MAC addresses.
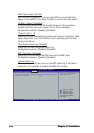
5. Type
asmc -bmc_ip xxx.xxx.xxx.xxxasmc -bmc_ip xxx.xxx.xxx.xxx
asmc -bmc_ip xxx.xxx.xxx.xxxasmc -bmc_ip xxx.xxx.xxx.xxx
asmc -bmc_ip xxx.xxx.xxx.xxx, then press <Enter> to
assign any IP address to the remote server LAN port. The screen
displays the request and response buffer. Write the remote server IP
address in a piece of paper for reference.
7. Restart the remote server, enter the BIOS setup, then boot from the
hard disk drive.
8. Configure the ASMB2 baud rate (asmc -sol_baud 57600).
Make sure that the ASMB2 baud rate is the same as the Remote Access
baud rate that you previously set in the BIOS. See section “2.4
BIOS remote console” for details.
9. Adjust the local/central server network settings, if necessary.