


ASUS P5N7A-VM 2-9
• Prepare the motherboard support DVD, the oppy disk, or the USB ash
disk containing the updated motherboard BIOS before using this utility.
• For the P5N7A-VM motherboard, this utility will not function when you use a
PATA optical drive.
• Always connect the SATA cable to the SATA1/SATA 2 connector; otherwise,
the utility will not function.
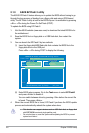
2.1.5 ASUS CrashFree BIOS 3 utility
The ASUS CrashFree BIOS 3 is an auto recovery tool that allows you to restore
the BIOS le when it fails or gets corrupted during the updating process. You can
update a corrupted BIOS le using the motherboard support DVD, the oppy disk
or the USB ash disk that contains the updated BIOS le.
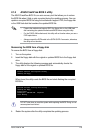
Recovering the BIOS from a oppy disk
To recover the BIOS from a oppy disk:
1. Turn on the system.
2. Insert the oppy disk with the original or updated BIOS le to the oppy disk
drive.
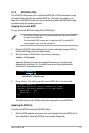
3. The utility displays the following message and automatically checks the
oppy disk for the original or updated BIOS le.
Bad BIOS checksum. Starting BIOS recovery...
Checking for oppy...
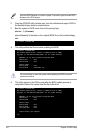
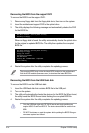
When found, the utility reads the BIOS le and starts ashing the corrupted
BIOS le.
Bad BIOS checksum. Starting BIOS recovery...
Checking for oppy...
Floppy found!
Reading le “P5N7AVM.ROM”. Completed.
Start ashing...
DO NOT shut down or reset the system while updating the BIOS! Doing so can
cause system boot failure!
4. Restart the system after the utility completes the updating process.