


2 - Getting Started
ASUS Wireless "WL-HDD" User’s Manual 17
Chapter 2 - Getting Started
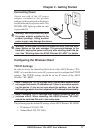
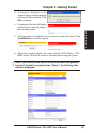
Connecting Power
Attach one end of the AC power
adapter, included in the product
package, to the power jack on the device
and the other end to a power outlet. The
POWER LED lights up when the unit
is powered ON.
Warning: Use the product only with
the power adapter supplied in the
product package. Using another
power supply may damage the device.
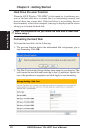
Warning: To shut down the ASUS Wireless WL-HDD, click the Shut-
down button on the web manager. This prevents damage to the
hard disk. Unplug the power cord only after shutting down the de-
vice. See “Shutting down the ASUS Wireless WL-HDD” for details.
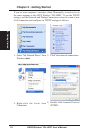
Configuring the Wireless Client
TCP/IP Settings
In order to access the shared hard disk drive of the ASUS Wireless "WL-
HDD" or to use the device as an AP, you may need to configure the TCP/IP
settings. The TCP/IP settings should be on the IP subnet of the ASUS
Wireless "WL-HDD".
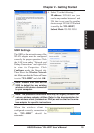
Note: Change the TCP/IP settings only if the wireless network does
not support automatic IP addresses or if there is a problem operat-
ing the device. If you are not sure about the settings, use the de-
fault settings where the client obtains the IP address automatically.
Note: Changing TCP/IP settings may require rebooting your PC
(wireless client). When rebooting, the ASUS Wireless "WL-HDD"
should be switched ON and in the ready state.
The following are the default IP settings of the ASUS Wireless WL-HDD:
• IP address 192.168.1.220
• Subnet Mask 255.255.255.0.