1110
INSTALLATION
Connect the Power:
Attach the power supply to the DC power jack labeled “DC 12V, 1A”
located on the rear of the MATRIX2. Once the power is connected to a
power source, the LED for port 01 will begin flashing. Sequentially push
the direct-access port selectors for ports 01 through 08 (16 for
F1DM216T). The corresponding LED should flash as each button is
pressed, indicating that the port is ready for connecting your servers.
Connect the Computer:
PS/2 Installation:
1. Using an OmniView MATRIX2 KVM Cable (Belkin part# F1D9300-XX),
plug the male 25-pin (DB25) connector into an available port, such as
“CPU 1”, on the back panel of the MATRIX2.
2. Connect the VGA HDDB15 connector to the VGA port on the
first computer.
3. Connect the PS/2 keyboard connector of the OmniView MATRIX2
KVM Cable to the keyboard port on the first computer.
4. Connect the PS/2 mouse KVM cable to the mouse port on the
first computer.
5. Repeat steps 1 through 4 for each additional PS/2 computer you wish
to connect.
Installation on a USB Computer:
1. Boot the computer you wish to connect via USB as you would
normally, with the keyboard, monitor, and mouse connected directly
to the computer.
2. After the operating system finishes loading, connect the MATRIX2 to
the USB computer using the USB connector on the MATRIX KVM
Cable (Belkin part# F1D9301-XX). Your computer should
recognize your MATRIX2 and automatically install the HID USB
driver, if necessary.
3. Once your computer finishes installing the USB driver, power down
your computer. Disconnect the USB connector from your computer.
INSTALLATION
SINGLE MATRIX2 INSTALLATION
This section provides complete instructions for the hardware setup of a
single MATRIX2 (F1DM208T, F1DM216T).
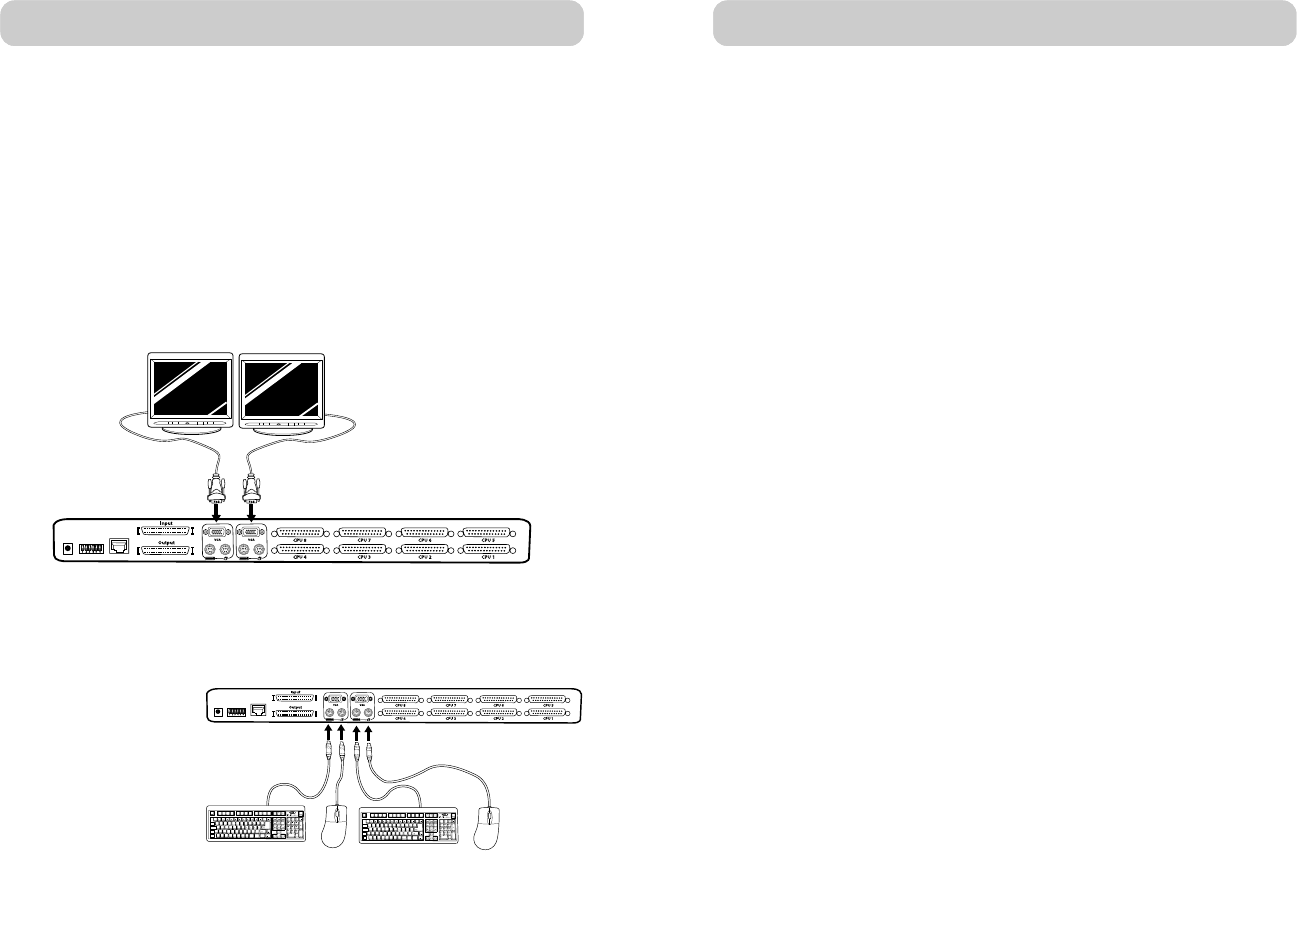
PS/2 Installation: Keyboard, Video, and Mouse Connections
Connect the Console:
1. Connect the first monitor to the MATRIX2. Attach your monitor cable
to the HDDB15 female port labeled “Console A VGA” on the back of
the MATRIX2.
2. Connect the PS/2 keyboard cable to the keyboard port on the back of
the MATRIX2 in the “Console A” section.
3. Connect the PS/2
mouse cable to the
mouse port on the
back of the
MATRIX2 in the
“Console A” section.
4. Repeat steps 1
through 3 for
Console B.
Console B
Console A
Console B
Console A
P73783_Omniview_matix2_man.qxd 3/5/02 5:00 PM Page 10
