


Appendix (continued)
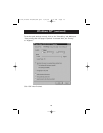
2. Select “Advanced” from the menu bar.
3. Select “Integrated Peripherals”.
4. Following the legend directions, select “ECP” as the parallel port mode.
5. Follow the legend directions to save the setting and exit “Setup”.
Hewlett-Packard
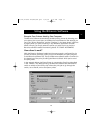
Steps for HP Pavillion PC Models
1. At the HP Blue Screen, press F1 to enter “Setup”.
2. Select “Advanced” from the menu bar.
3. Following the legend directions, select “Peripheral Configuration” and then use
the arrow-down key to move to “Parallel Port Mode”.
4. Select the mode with the highest performance (e.g. “ECP”).
5. Follow the legend directions to save the setting and exit “Setup”.
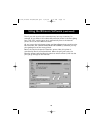
Steps for HP Vectra PC Series
1. While the computer is booting, follow the directions on the screen: Press F2 to
enter “Setup”. This is displayed at the bottom of the “Hewlett Packard System
Hardware Test” screen.
2. Use the arrow keys to highlight “Parallel Port Mode”.
3. Follow the legend directions on how to change the options.
4. Set the port mode with the highest performance (e.g. “ECP”).
5. Follow the legend directions to save the setting and exit “Setup”.
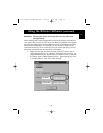
Steps for HP Vectra 500 PC Series
1. While the computer is booting, follow the directions on the screen: Press F2 to
Enter “Setup”. This is displayed at the bottom of the “Hewlett Packard System
Hardware Test” screen.
2. Use the arrow keys to highlight “Parallel Port Mode”.
3. Follow the legend directions on how to change the options.
4. Set the port mode with the highest performance (e.g. “ECP”).
5. Follow the legend directions to save the setting and exit “Setup”.
Steps for HP OmniBook 5000 and 5500 PCs
1. While the computer is booting, follow the directions on the screen: Press F2 to
Enter “Setup”. This is displayed at the bottom of the “Hewlett Packard System
Hardware Test” screen.
2. Use the arrow keys to highlight “Parallel Port Mode”.
3. Follow the legend directions on how to change the options while selecting the
parallel port mode with the highest performance (e.g. “ECP”).
4. Follow the legend directions to save the setting and exit “Setup”.
5. Add the “Ecpon.com” program to the computer's “Autoexec.bat” file. You can
find this file on the compact disc or on Disk 1 of the disk set.
IBM Aptiva
General Steps
24
P73121/F1U126-KIT/EU/man.qxd 4/28/00 1:06 PM Page 24