9
the Video input to be digitized. The options in the
dialog box will change to “Source options”.
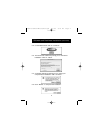
4. Your Digitizer is “USB Vision”. This may be the only option.
5. Select your “Input”: either “S-Video” or “C-Video”
depending on the type of your connection.
6. Select your “Format”: NTSC, PAL or SECAM. NTSC is
the standard in the United States and Japan, PAL is used
in Europe and SECAM is used in France. Click “OK”.
7. Again, from the “Digitize” menu, select “Sound On” to
enable the Audio digitizing function. A check mark next
to the command indicates it’s already active.
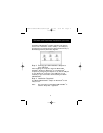
8. From the “Digitizing” menu, select “Sound Settings”.
The “Sound” dialogue box appears.
9. From the “Sound Settings” pop-up menu select
“Source”. This option is used to select the source for the
Audio input to be digitized. The options in the left half
of the “Sound” dialogue change to “Source” options.
10. From the “Device” pop-up menu, select “Built-in”. This
may be the only option.
11. From the “Input” pop-up menu, select “Sound In”.
12. From the “Speaker” pop-up menu, select “On”. This will
allow you to hear the audio through your computer’s
speaker while you are recording. Click “OK”.
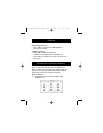
To Test your connections:
1. Turn on your VCR, insert a tape and press play. If you
are using a camcorder, turn the power on.
2. Observe the video appears in the preview area of the
“Digitizing Window”.
3. Observe the audio is playing through the
computer’s speaker.
Digitizing Clips using Strata
™
VideoShop
™
4.5
on the USB VideoBus
™
(continued)
P73261/F5U206-MAC/US/man.qxd 1/7/00 5:23 PM Page 9


