Chapter 2
22
Choosing the right print media 2
Paper type and size for each operation 2
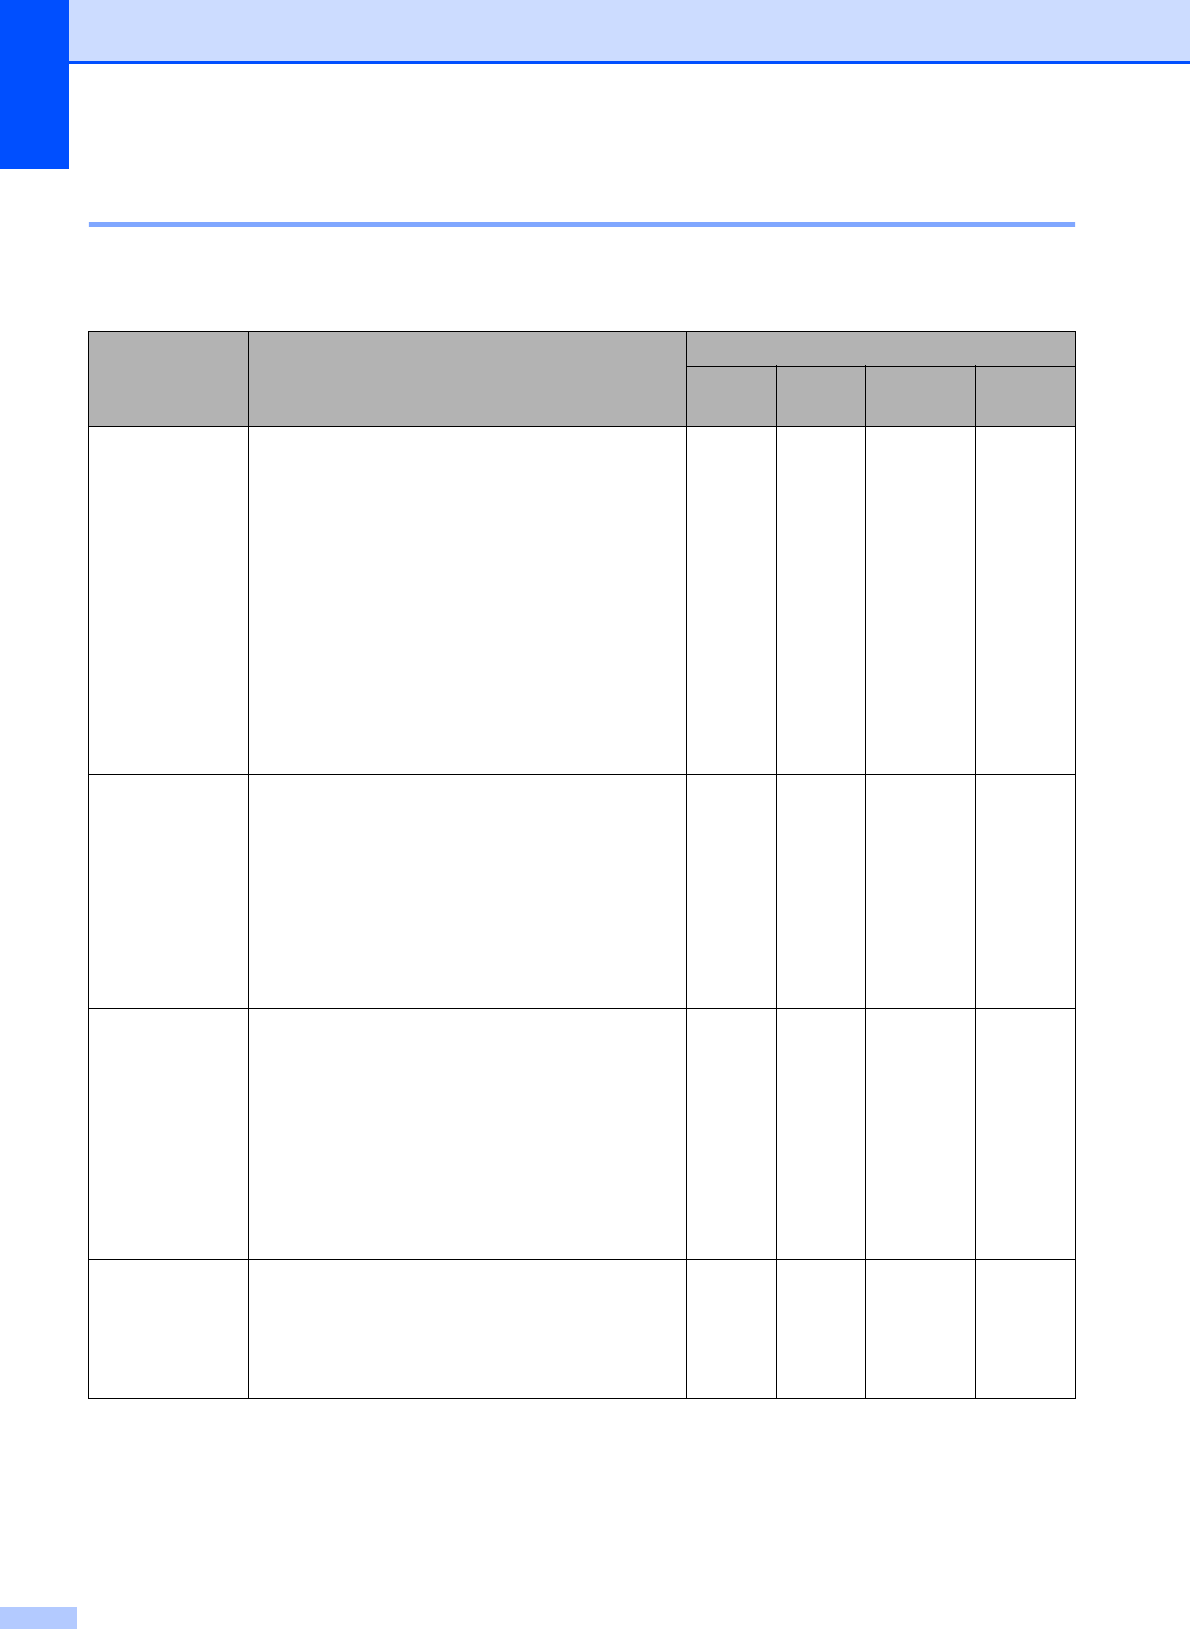
Paper Type Paper Size Usage
Fax Copy Photo
Capture
Printer
Cut Sheet Ledger 279.4 × 431.8 mm (11 × 17 in.) Yes Yes Yes Yes
A3 297 × 420 mm (11.7 × 16.5 in.) Yes Yes Yes Yes
Letter 215.9 × 279.4 mm (8 1/2 × 11 in.) Yes Yes Yes Yes
A4 210 × 297 mm (8.3 × 11.7 in.) Yes Yes Yes Yes
Legal 215.9 × 355.6 mm (8 1/2 × 14 in.) Yes Yes – Yes
Executive 184 × 267 mm (7 1/4 × 10 1/2 in.) – – – Yes
JIS B4 257 × 364 mm (10.1 × 14.3 in.) – – – Yes
JIS B5 182 × 257 mm (7.2 × 10.1 in.) – – – Yes
A5 148 × 210 mm (5.8 × 8.3 in.) – Yes – Yes
A6 105 × 148 mm (4.1 × 5.8 in.) – – – Yes
Cards Photo 10 × 15 cm (4 × 6 in.) – Yes Yes Yes
Photo L 89 × 127 mm (3 1/2 × 5 in.) – – – Yes
Photo 2L 13 × 18 cm (5 × 7 in.) – – Yes Yes
Index Card 127 × 203 mm (5 × 8 in.) ––– Yes
PostCard 1
100 × 148 mm (3.9 × 5.8 in.) – – – Yes
PostCard 2
(Double)
148 × 200 mm (5.8 × 7.9 in.) – – – Yes
Envelopes C5
Envelope
162 × 229 mm (6.4 × 9 in.) – – – Yes
DL
Envelope
110 × 220 mm (4.3 × 8.7 in.) – – – Yes
COM-10 105 × 241 mm (4 1/8 × 9 1/2 in.) – – – Yes
Monarch 98 × 191 mm (3 7/8 × 7 1/2 in.) – – – Yes
JE4
Envelope
105 × 235 mm (4.1 × 9.3 in.) – – – Yes
Transparencies
Letter 215.9 × 279.4 mm (8 1/2 × 11 in.) – Yes – Yes
A4 210 × 297 mm (8.3 × 11.7 in.) – Yes – Yes
Legal 215.9 × 355.6 mm (8 1/2 × 14 in.) – Yes – Yes
A5 148 × 210 mm (5.8 × 8.3 in.) – Yes – Yes


