4 - 3 OPTIONS
4
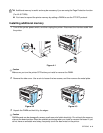
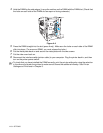
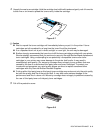
Hold the DIMM by the side edges. Line up the notches on the DIMM with the DIMM slot. (Check that
the locks on each side of the DIMM slot are open or facing outwards.)
Figure 4-4
5
Press the DIMM straight into the slot (press firmly). Make sure the locks on each side of the DIMM
click into place. (To remove a DIMM, you must release the locks.)
6
Put the metal plate back on and secure the metal plate with the two screws.
7
Put the side cover back on.
8
Reconnect the interface cable (printer cable) to your computer. Plug the printer back in, and then
turn on the printer power switch.
To check that you have installed the DIMM correctly, print the printer settings by using the selection
in the driver and check the printout to make sure it shows the additional memory. See Printer
Settings and Print fonts in Chapter 3.


