


Chapter 8
58
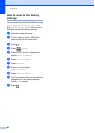
Color Enhancement (True2Life™) 8
You can turn on the color enhancement
(True2Life™) feature to print more vivid
images. Print time will be slower.
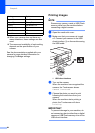
a Open the media slot cover.
b Put the memory card or USB Flash
memory drive in the correct slot.
c Do one of the following:
Press View Photos and press
s or t on the Touchpanel to display
each photo. When the photo you
want to print is displayed, press OK.
Press Print All.
d Press Options.
e Press s or t to display
Color Enhance.
f Press Color Enhance.
g Do one of the following:
If you want to adjust the
White Balance, Sharpness or
Color Density, press
Color Enhance and then press
On.
Go to step h .
If you do not want to adjust the color
settings, press Color Enhance
and then press Off.
Press .
Go to step k .
h Press s or t to display
White Balance, Sharpness or
Color Density, and then press the
option you want to change.
i Press d or c to adjust the degree of the
setting.
Press OK.
j Do one of the following:
If you want to adjust another color
setting, repeat steps h and i.
Press .
If you want to change other settings,
press to display the print setting
menu and press the setting you want
to change. (See page 55.)
k If you do not want to change additional
settings, press or OK.
l Press Start to print.
NOTE
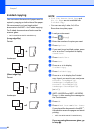
• White Balance
This setting adjusts the hue of the white
areas of an image. Lighting, camera
settings and other influences will affect the
appearance of white. The white areas of a
picture may be slightly pink, yellow or
some other color. By using this setting,
you can correct that effect and bring the
white areas back to pure white.
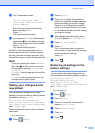
• Sharpness
This setting enhances the detail of an
image, similar to adjusting the fine focus
on a camera. If the image is not in true
focus and you cannot see the fine details
of the picture, then adjust the sharpness.
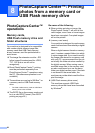
• Color Density
This setting adjusts the total amount of
color in the image. You can increase or
decrease the amount of color in an image
to improve a washed out or weak picture.