


29
PCATX-R9 User’s Guide
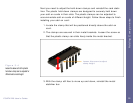
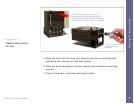
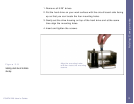
5. Slide the drive into the drive bay. Secure the drive by inserting and
tightening four screws on both side panels.
6. Slide the drive cage back into the chassis and reinstall all mounting
screws.
7. Plug in the power connector and signal cable.
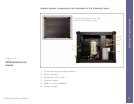
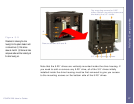
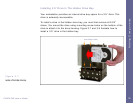
Figure 3.6
Procedures for adding or removing
5.25” drives.
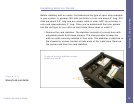
The metal plate is used only for
fastening the drive housing to the
chassis. Removing the top mounting
screws also loosens this metal plate.
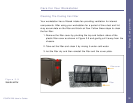
5.25” drive bottom
side mounting
screws.
Adding Components