


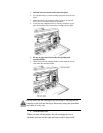
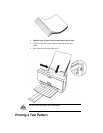
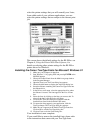

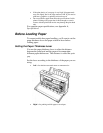

select the printer settings that you will normally use. Later,
from within each of your software applications, you can
select the printer settings that are unique to the current print
job.
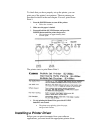
This screen shows the default settings for the BJ-200ex. see
Chapter 4, Using the Printer With Your Software, for
details on selecting other printer settings for the BJ-200ex
printer driver for Windows.
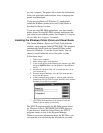
Installing the Canon TrueType Fonts for Microsoft Windows 3.1
1. Make sure your computer is turned on.
2. Start Windows 3.1 by typing WIN and pressing ENTER at the
MS-DOS prompt.
3. Choose the Control Panel from the Main icon group window
in the Program Manager.
4. Open the Fonts icon. The Fonts dialog box appears.
5. Choose the Add button to display the Add Fonts dialog box.
6. Insert the diskette containing the Canon TrueType Fonts into
the diskette drive.
7. In the Drives scroll menu, select the appropriate drive where
the diskette is located. The fonts appear in the List of Fonts
box.
8. Select the fonts by clicking on the fonts you want to add. To
select all the fonts, click the Select All button.
9. Click on OK. The Fonts dialog box reappears with the
installed fonts listed in the Installed Fonts menu.
10. To ensure the fonts appear in your application, click the
TrueType button. The TrueType dialog box appears.
11. Make sure an X appears in the Enable TrueType Fonts box.
Click on OK to exit the TrueType dialog box.
12. Click on Close to exit the Fonts dialog box.
Your installation is now complete.
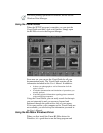
If you would like to remove the installed fonts, please refer
to the instructions that came with your TrueType fonts.