


Photo 14
Photo 17
P
hot
o 19
Photo 20
4 WX Technical Instructions
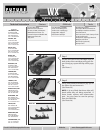
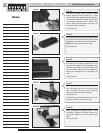
Step 14
Install the retaining ring.
(See Photo 14)
Step 15
Set waste hopper aside and cover.
Step 16
If you have a toner hopper fixture, place
toner hopper in fixture or place toner
hopper on the workbench.
Need trust-worthy, detailed Technical
Instructions for another engine?
Visit: www.futuregraphicsllc.com
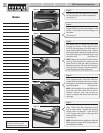
Step 17
Remove the two screws holding the end
cap on the gear side of the toner hopper.
(See Photo 17)
Photo 18
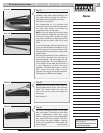
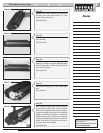
Step 20
T
ur
n the c
artridge around. Remove the
two screws that hold the other end cap
on and remove.
(See Photo 20)
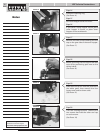
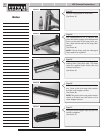
Step 19
Slide the end cap off. Note the position of
the white gears, then remove the four
largest ones and set them aside.
(See Photo 19)
Step 18
Before removing the end cap, lift the bias
strip off its positioning post next to the
doctor blade.
(See Photo 18)
Notes