


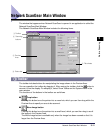


Network ScanGear Main Window
3-13
3
Before Scanning
33
33
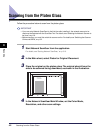
Preview Area
This area shows a preview of how the image will look when the original is scanned.
Use it to check the image appearance, and to adjust the scanning area selection or scan
settings.
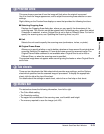
Right-clicking on the Preview Area displays a menu that provides the following functions.
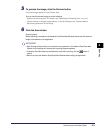
■ Selecting Cropping Area
Displays the Cropping Area dialog box, where you can specify the dimensions of the
scanning area. This function cannot be selected with 2-sided scanning, when Auto-adjust
Orientation is selected, or when Original Size is set to Auto or Different Sizes. For how to
specify the scanning area, see ‘Specifing the Scanning Area,’ on p.4-8.
■ Unit
Selects the unit used to specify the scanning area (centimeters, inches, or pixels).
■ Original Frame Erase
Allows you to specify whether or not to delete a shadow or frame around the original when
scanning. Selecting On applies a 2.5 mm white frame around the scanned image. The
Original Frame Erase command is not available when Original Size is set to Auto or
Different Sizes, or when the scanning area is specified.
The preview image does not appear when scanning using the feeder or when Original Size is
set to Auto.
44
44
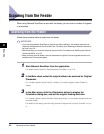
Tab sheets
There are two tab sheets: the Main sheet which provides scan settings, and the Options
sheet which specifies how the scanned image is processed. To display the appropriate
sheet, click the tab at the top of the sheet.
For details about the settings on each sheet, refer to the on-line help on that sheet.
55
55
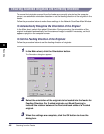
Status bar
The status bar shows the following information, from left to right.
• The Color Mode setting
• The Resolution setting
• The upper left coordinates of the scanning area, and its width and height
• The memory required to scan the image (unit: KB)