


21
Quick Start Basics
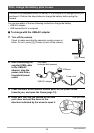
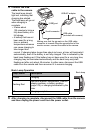
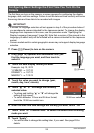
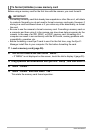
3. Hook your nail into the groove of the USB
port cover and pull the cover in the
direction indicated by the arrow to open it.
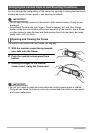
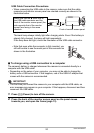
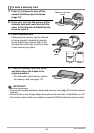
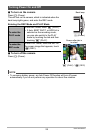
4. With your computer
turned on, connect the
camera to it.
The camera’s back lamp will
light red. After a short while,
the camera will turn on
automatically and the back
lamp will light amber to
indicate that charging has
started.
The back lamp will light
green when charging is
complete. Note, however,
that some computer models
or connection conditions can
produce low supply capacity.
If low supply capacity exists,
charging will start without the
camera turning on. This is indicated by the back lamp lighting red. The back lamp
will go out in this case after charging is complete.
• It takes about 260 minutes to bring a fully dead battery to a full charge.
• A battery that has not been used for a long time or ambient temperature
extremes can cause charging to take longer than normal. If charging takes
longer than about six hours, a timer will terminate it automatically, even if the
battery is not fully charged. This is indicated by the back lamp flashing red. If
the battery has not been used for a very long time, charging may be terminated
automatically and the back lamp may start flashing red or go out after only
about 30 minutes to 45 minutes. In either case, use of the USB-AC adaptor that
comes with the camera is recommended.
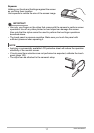
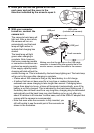
• Note that even while the connector is fully inserted, you
still will be able to see the metal part of the connector as
shown in the illustration.
USB port cover
USB port
USB cable
(included with camera)
[USB] port
Large connector
Small connector
Making sure that the 8 mark on the USB cable
connector is towards the side opposite that of the
monitor screen, connect the cable to the camera.