


83
Using the Camera with a Computer
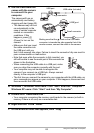
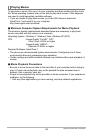
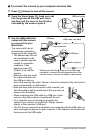
3. Use the USB cable that
comes with the camera
to connect it to your
computer.
The camera will turn on
automatically and battery
charging will start (page 20).
• The camera may not turn
on automatically in the
case of certain computer
models or connection
conditions. If this
happens, press [p]
(Power) to turn on the
camera.
• Make sure that you insert
the cable connector into
the USB port until you
feel it click securely into place. Failure to insert the connector fully can result in
poor communication or malfunction.
• Note that even while the connector is fully inserted, you
still will be able to see the metal part of the connector as
shown in the illustration.
• When connecting the USB cable to a USB port, make
sure you align the connector correctly with the port.
• Your computer may not be able to recognize the
camera if you connect via a USB hub. Always connect
directly to the computer’s USB port.
• The first time you connect the camera to your computer with the USB cable, an
error message may appear on your computer. If this happens, disconnect and
then reconnect the USB cable.
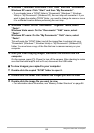
4. Windows 7, Windows Vista users: Click “Start” and then “Computer”.
Windows XP users: Click “Start” and then “My Computer”.
5. Double-click “Removable Disk”.
• Your computer recognizes the memory card loaded in the camera (or built-in
memory if there is no card) as a removable disk.
6. Right-click the “DCIM” folder.
7. On the shortcut menu that appears, click “Copy”.
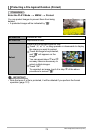
USB port
USB cable (included)
[USB] port
Large connector
Small connector
Making sure that the 8 mark on the USB cable
connector is towards the side opposite that of the
monitor screen, connect the cable to the camera.