13-4
Cisco ASA Series Firewall CLI Configuration Guide
Chapter 13 Configuring Inspection for Management Application Protocols
GTP Inspection
Configuring a GTP Inspection Policy Map for Additional Inspection Control
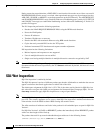
If you want to enforce additional parameters on GTP traffic, create and configure a GTP map. If you do
not specify a map with the inspect gtp command, the ASA uses the default GTP map, which is
preconfigured with the following default values:
• request-queue 200
• timeout gsn 0:30:00
• timeout pdp-context 0:30:00
• timeout request 0:01:00
• timeout signaling 0:30:00
• timeout tunnel 0:01:00
• tunnel-limit 500
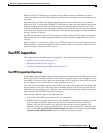
To create and configure a GTP map, perform the following steps. You can then apply the GTP map when
you enable GTP inspection according to the “Configuring Application Layer Protocol Inspection”
section on page 9-7.
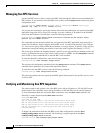
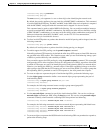
Step 1 Create a GTP inspection policy map, enter the following command:
ciscoasa(config)# policy-map type inspect gtp policy_map_name
ciscoasa(config-pmap)#
Where the policy_map_name is the name of the policy map. The CLI enters policy-map configuration
mode.
Step 2 (Optional) To add a description to the policy map, enter the following command:
ciscoasa(config-pmap)# description string
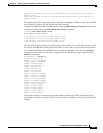
Step 3 To match an Access Point name, enter the following command:
ciscoasa(config-pmap)# match [not] apn regex [regex_name | class regex_class_name]
Step 4 To match a message ID, enter the following command:
ciscoasa(config-pmap)# match [not] message id [message_id | range lower_range upper_range]
Where the message_id is an alphanumeric identifier between 1 and 255. The lower_range is lower range
of message IDs. The upper_range is the upper range of message IDs.
Step 5 To match a message length, enter the following command:
ciscoasa(config-pmap)# match [not] message length min min_length max max_length
Where the min_length and max_length are both between 1 and 65536. The length specified by this
command is the sum of the GTP header and the rest of the message, which is the payload of the UDP
packet.
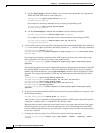
Step 6 To match the version, enter the following command:
ciscoasa(config-pmap)# match [not] version [version_id | range lower_range upper_range]
Where the version_id is between 0and 255. The lower_range is lower range of versions. The
upper_range is the upper range of versions.
Step 7 To configure parameters that affect the inspection engine, perform the following steps:
a. To enter parameters configuration mode, enter the following command:


