


34
Chapter 5: Configuring the Router
The Administration Tab - Log
EtherFast Cable/DSL Router with 4-Port Switch
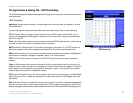
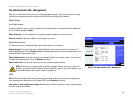
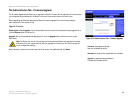
The Administration Tab - Log
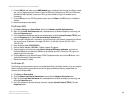
The Log screen provides you with a log of all incoming and outgoing URLs or IP addresses for your Internet
connection.
Log
Log. To keep activity logs, select the Yes radio button. With logging enabled, you can choose to view temporary
logs or keep a permanent record using the Logviewer software. Click the No button to disable this function.
Logviewer IP Address. For a permanent record of these logs, Logviewer software must be used. This software
is downloadable from the Linksys website, www.linksys.com. The Logviewer saves all incoming and outgoing
activity in a permanent file on your PC’s hard drive. In the Logviewer IP Address field, enter the fixed IP address of
the PC running the Logviewer software. The Router will now send updated logs to that PC.
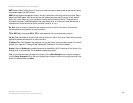
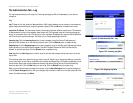
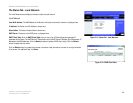
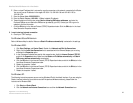
Incoming Log. Click the Incoming Log button to view a temporary log of the Source IP addresses and
Destination Port Numbers for all the incoming Internet traffic. Click the Refresh button to update the log.
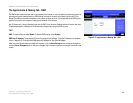
Outgoing Log. Click the Outgoing Log button to view a temporary log of all the URLs and IP addresses of Internet
sites that users on your network have accessed. The LAN IP address, Destination URL/IP, and Service/Port
Number for each site are listed. Click the Refresh button to update the log.
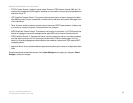
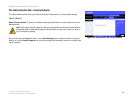
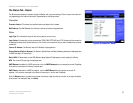
View Log. Click the View Log button to view a log of all activities and to access a drop-down menu of various
logs to view.
From the drop-down menu, select the log you wish to view, All, System Log, or Access Log. When you select All,
you will see a log of all activities, a combination of the System and Access Logs. The System Log displays a list of
cold and warm starts, web login successes and failures, and packet filtering policies, while the Access Log
shows all data traffic. Click the Clear button to clear a log. Click the Refresh button to update a log.
When you have finished making changes to this screen, click the Save Settings button to save the changes, or
click the Cancel Changes button to undo your changes. Help information is shown on the right-hand side of the
screen. For additional help, click More.
Figure 5-24: Administration Tab - Log
Figure 5-26: Outgoing Log Table
Figure 5-25: Incoming Log Table
Figure 5-27: System Log