


39
Appendix A: Troubleshooting
Common Problems and Solutions
EtherFast Cable/DSL Router with 4-Port Switch
Appendix A: Troubleshooting
This appendix provides solutions to problems that may occur during the installation and operation of the Router.
Read the description below to solve your problems. If you can't find an answer here, check the Linksys website at
www.linksys.com.
Common Problems and Solutions
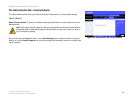
1. I’m trying to access the Router’s Web-based Utility, but I do not see the login screen. Instead, I see a
screen saying, “404 Forbidden.”
If you are using Windows Explorer, perform the following steps until you see the Web-based Utility’s login
screen (Netscape Navigator will require similar steps):
A. Click File. Make sure Work Offline is NOT checked.
B. Press CTRL + F5. This is a hard refresh, which will force Windows Explorer to load new webpages, not
cached ones.
C. Click Tools. Click Internet Options. Click the Security tab. Click the Default level button. Make sure the
security level is Medium or lower. Then click the OK button.
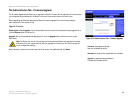
2. I need to set a static IP address on a PC.
The Router, by default, assigns an IP address range of 192.168.1.100 to 192.168.1.149 using the DHCP server
on the Router. To set a static IP address, you can only use the ranges 192.168.1.2 to 192.168.1.99 and
192.168.1.151 to 192.168.1.254. Each PC or network device that uses TCP/IP must have a unique address to
identify itself in a network. If the IP address is not unique to a network, Windows will generate an IP conflict
error message. You can assign a static IP address to a PC by performing the following steps:
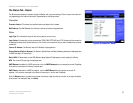
For Windows 98 and Millennium:
A. Click Start, Setting, and Control Panel. Double-click Network.
B. In The following network components are installed box, select the TCP/IP-> associated with your
Ethernet adapter. If you only have one Ethernet adapter installed, you will only see one TCP/IP line with no
association to an Ethernet adapter. Highlight it and click the Properties button.
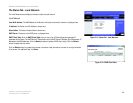
C. In the TCP/IP properties window, select the IP address tab, and select Specify an IP address. Enter a
unique IP address that is not used by any other computer on the network connected to the Router. You can
only use an IP address in the ranges 192.168.1.2 to 192.168.1.99 and 192.168.1.150 to 192.168.1.254.
Make sure that each IP address is unique for each PC or network device.
D. Click the Gateway tab, and in the New Gateway prompt, enter 192.168.1.1, which is the default IP
address of the Router. Click the Add button to accept the entry.