— 14 —
ENGLISH
3. OPERATION
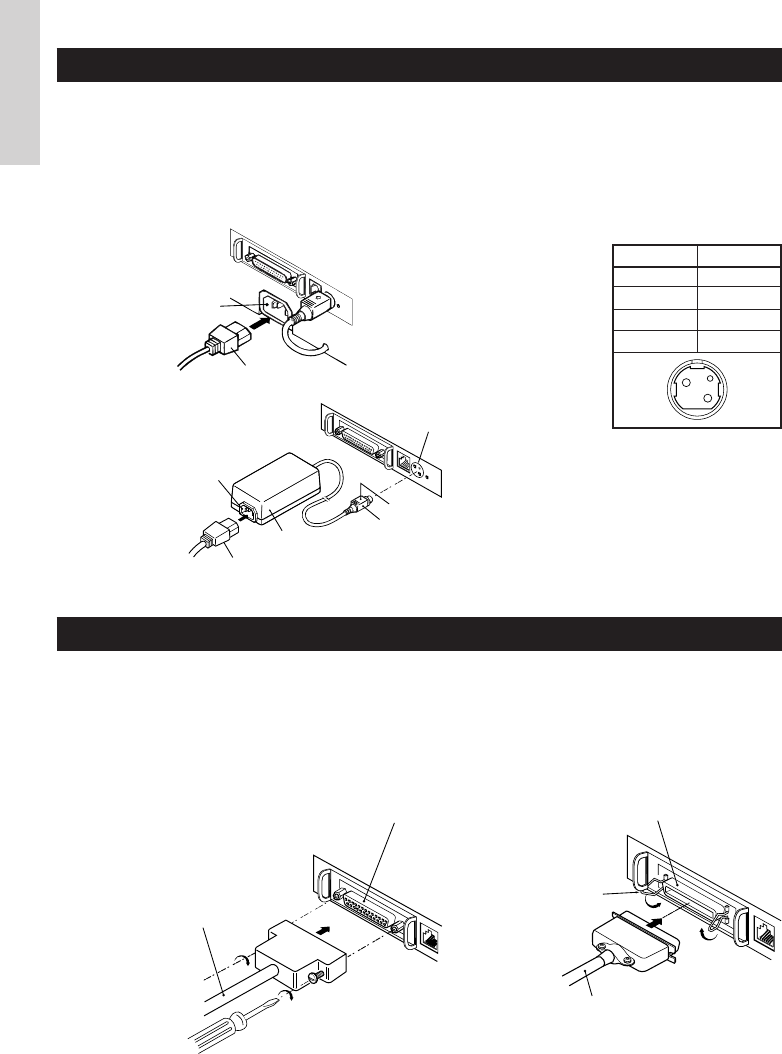
3.1 Connecting the AC Adapter and AC Power Cord
1 Turn off the power of the printer.
2 For the AC adapter type only: With the flat side of the AC adapter’s cable connector
facing upward, insert the cable connector into the power connector on the back side of
the printer.
3 Connect the AC power cord to the inlet of the printer, and insert the AC power-cord
plug into a suitable wall outlet.
Power connector pin configuration
No.
1
2
3
SHELL
Function
+24
GND
N.C
F. G
Standard type
Inlet
AC power cord
Power connector
Flat side
Cable connector
1 Turn off the power of the printer. (As well as the connected host computer.)
2 Orient the interface cable terminal correctly and insert it into the interface connector.
3 Secure the cable terminal as shown below.
Serial interface cable: Fasten the connector with screws.
Parallel interface cable: Hold the connector with clamps.
4 Connect the other end of the interface cable to the host computer.
3.2 Connecting Interface Cables
Serial interface cable
Serial interface connector Parallel interface connector
AC adapter type
Inlet
AC adapter
AC adapter cord
1
3
2
Connector used:
TCS7960-53-2010 (Hosiden) or
equivalent
Applicable connector:
TCP8927-63-1100 (Hosiden) or
equivalent
TCP8927-53-1100 (Hosiden) or
equivalent
Clamps
Parallel interface cable


