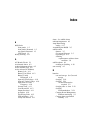
Index 5
Input AC Over Voltage
audible alarm 4-10
Input AC Over Voltage (LCD
Menu ) 4-10
Input AC Under Voltage (LCD
Menu) 4-10
Input Frequency (LCD Menu) 4-8
Input Over or Under Frequency
(LCD Menu) 4-10
input specifications C-2
Input Volts (LCD Menu) 4-8
Input Wiring 2-12
input wiring entry port
illustrated 2-10
input wiring inspection panel
illustrated 2-10
installation
attaching chassis to rack 2-6
conduit, flexible metal 2-10
Extended Runtime Module
position 2-5
fixed rail requirement 2-5
High Leakage Current 2-9
installation card 2-2
installing options 2-3
installing the fixed rails See
Depth Adjustable Fixed
Rails Installation Card
lifting and stabilizing 2-2, 2-5
lift-out tray 2-4
Lockout/Tagout 2-7
mounting on fixed rail
requirement 2-2
of options, requirement for
Trained Service
Technician 2-1
placing UPS in rack 2-5
position at bottom of rack 2-3
position considerations 2-2
positioning requirements 2-5
rack template 2-2
reducing overall weight 2-2
reducing weight 2-5
removing pluggable power
supplies 2-2, 2-5
requirement for two person
lift 2-5
Risk of Fire Notice 2-9
self test
automatic initiation on power
up 2-23
transporting R6000 to install
location 2-4
weight considerations 2-2
Installation Card 2-4
Installation Procedure 2-3
installing a UPS
checking the load 2-20
completing the
installation 2-24
Standby mode 2-24
connecting the devices 2-20
connecting the REPO port 2-7
cumulative total device Watts
or VA rating 2-20
starting up the UPS
checking the Battery Recharge
Date label 2-4
Installing and connecting battery
packs 2-12
Installing Extended Runtime
Modules (ERMs) 2-17
Installing New Batteries 5-8
installing options 2-3
Inverter Fault (LCD Menu) 4-11
Italian 4-17
J
Japanese 4-17
L
LanSafe III
overview 1-7
LCD Display Menu
configuration 4-3
navigation 4-3
LED Alarm Configurations 6-8
LED display See front panel,
indicators
licensed electrician 2-7, 2-10, 4-2
lift-out tray 2-4
using 2-5


