


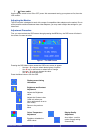
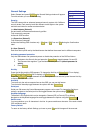
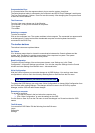
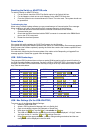

Single computer Settings
To see all the Settings of a single computer, right click
the computer icon. The Settings appear as in the
figure below.
Note! There is no Select box to check.
Loading a saved configuration
To load a saved configuration:
From the File menu choose Open.
Note: All changes done with the Control software are only reflected in the OSD
AFTER pressing “Write Configuration”
The factory default Settings
To revert to the factory default Settings:
On the toolbar press “Set Default”
There is no need to press “Write Configuration”.
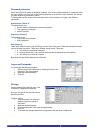
Upgrading the SCOUTutp firmware
With the SCOUTutp Update software program you can upgrade the firmware for the OSD, the
Manager and the Adaptors
SCOUTutp Update enables you to add new features and fix bugs in a quick and efficient manner.
You can install the SCOUTutp Switch Update on any computer, even one not part of the SCOUTutp
system.
The SCOUTutp Update software and latest firmware is on the Documentation CD, and on the Daxten
website
www.daxten.com
System requirements for the SCOUTutp Update software
Pentium 166 or higher, 16 MB RAM and 10 MB free Hard Drive space.
Free Serial port. Windows 98 and later.
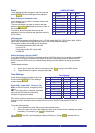
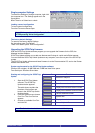
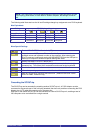
Button or Box Function
Select
Selects all Adaptors
Unselect
Unselects selected Adaptors
Start
Starts firmware download
F/W
Displays the firmware version number
H/W
Displays the hardware version number
Cancel
Cancels selected function
10:06
System time
Status
Displays download status
File
Name of Update file
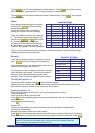
Starting and configuring the SCOUTutp
Update
1. Start the SCOUTutp Update
software. The SCOUTutp
Update window appears
The table shown explains the
functions of the buttons and
boxes in the SCOUTutp Switch
Update window.
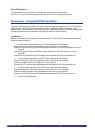
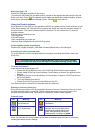
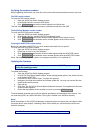
2. From the Options menu choose
Com Port. The Com Port box
appears.
3. Choose an available Com Port
and click OK.
Note! The Serial download cable must be connected to the selected Serial port.
RackAccess i Series
15
User Guide