


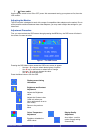

Auto-Adjustment
We recommend that you use the Auto-Adjustment to get optimized video quality.
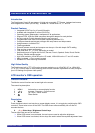
Use the
+
+
&
▬
▬ key to select auto-adjustment, then press
▼
▼ key to get optimized quality.
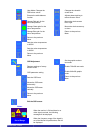
Introduction – Integrated SCOUTutp Switch
The built in KVM switch (SCOUTutp) will ensure easy and accurate control of up to 16 PCs through a
single console. The SCOUTutp is compatible with PS/2, USB and SUN style computers. It has
keyboard and mouse emulation for error free boot-ups. Switching between PCs can be accomplished
through keyboard Hot Key commands, or through the OSD (On-Screen-Display).
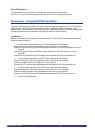
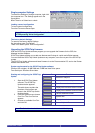
Installation
Before connecting your computers and console devices to the SCOUTutp switch, please ensure that
all devices are powered off.
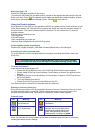
1. Connecting the computers with an UTP patch cable and a PS/2 adapter :
Connect the blue HD 15-pin male connector to the VGA port on your computer.
Connect the purple PS/2 (6-pin Mini DIN) keyboard connector to the PS/2 keyboard port on your
computer.
Connect the green PS/2 (6-pin Mini DIN) mouse connector to the PS/2 mouse port on your
computer.
Connect the UTP cable with the PS/2 adapter and the desired SCOUTutp computer port.
2. Connecting the computers with an UTP patch cable and a USB adapter:
Connect the blue HD 15-pin male connector to the VGA port on your computer.
Connect the USB connector to a USB port on your computer.
Connect the UTP cable with the USB adapter and the desired SCOUTutp computer port.
3. Connecting the computers with an UTP patch cable and a SUN adapter:
Connect the blue HD 15-pin male connector to the VGA port on your computer.
Connect the SUN connector to the keyboard & mouse port on your computer.
Connect the UTP cable with the SUN adapter and the desired SCOUTutp computer port.
4. Power up the RackAccess.
RackAccess i Series
7
User Guide