Installing System Components 105
7
Reinstall the SAS controller daughter card. See "Installing a SAS Controller Daughter Card" on
page 70.
8
Reattach the SAS controller daughter card cables and the control panel cable. See "SAS and SAS RAID
Controller Daughter Card Cabling Guidelines" on page 72.
9
Reinstall the hard drives. See "Installing a Hot-Plug Hard Drive" on page 57.
NOTE: Reinstall the hard drives in the same drive bays from which they were removed.
10
If applicable, reconnect the internal tape drive. See "Removing and Installing an Internal SCSI Tape
Drive" on page 86.
11
If applicable, reconnect the diskette drive. See "Installing the Diskette Drive Into the System" on
page 84.
12
If applicable, reconnect the optical drive. See "Installing the Optical Drive" on page 82.
13
Close the system. See "Closing the System" on page 55.
Control Panel Assembly (Service-only Procedure)
NOTE: The control panel assembly consists of two separate modules—the display module and the control panel
circuit board. Use the following instructions to remove and install either module.
Removing the Control Panel Assembly
CAUTION: Only trained service technicians are authorized to remove the system cover and access any of the
components inside the system. See your Product Information Guide for complete information about safety
precautions, working inside the computer, and protecting against electrostatic discharge.
1
If applicable, remove the bezel. See "Removing the Front Bezel" on page 53.
2
Turn off the system and attached peripherals, and disconnect the system from the electrical outlet and
peripherals.
3
Open the system. See "Opening the System" on page 54.
4
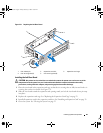
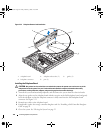
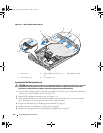
Disconnect the control panel cable at back of the control panel board. See Figure 3-35.
NOTICE: Do not pull on the cable to unseat the connector. Doing so can damage the cable.
a
Squeeze the metal tabs on the ends of the cable connector.
b
Gently work the connector out of the socket.
5
Disconnect the display module cable from the control panel board. See Figure 3-35.
6
Remove the three screws that secure the control panel board to the system chassis and remove the
board. See Figure 3-35.
7
Remove the display module:
a
Insert the end of paper clip into the hole on the right side of the display module and gently pry off
the label.
Book.book Page 105 Friday, February 3, 2006 11:09 AM


