50 Removing and Installing Parts
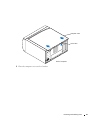
Removing the Computer Cover
CAUTION: Before you begin any of the procedures in this section, follow the safety instructions located in the
Product Information Guide.
CAUTION: To guard against electrical shock, always unplug your computer from the electrical outlet before
opening the cover.
1
Follow the procedures in "Before You Begin" on page 45.
2
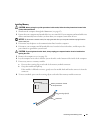
Lay your computer on its side with the computer cover facing up.
3
If your computer cover has a cover latch, slide and hold the cover latch.
4
Grip the indents on the computer cover, and slide the computer cover toward the back of the
computer.
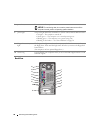
10 microphone connector Use the pink microphone connector to attach a personal computer microphone
for voice or musical input into a sound or telephony program.
On computers with a sound card, the microphone connector is on the card.
11 line-out connector Use the green line-out connector to attach headphones and most speakers with
integrated amplifiers.
On computers with a sound card, use the connector on the card.
12 keyboard connector If you have a standard keyboard, plug it into the purple keyboard connector. If you
have a USB keyboard, plug it into a USB connector.
13 integrated video
connector
If this connector has a protective cap over it, then your computer has the optional
video card installed. If this connector does not have a protective cap over it, plug the
cable from your monitor into the blue connector.
14 serial connector Connect a serial device, such as a handheld device, to the serial port.
15 voltage selection switch
(may not be available on
all computers)
See the safety instructions located in the Product Information Guide for more
information.
16 power connector Insert the power cable.


