


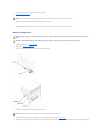

5. Unpack the additional hard drive.
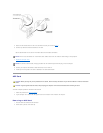
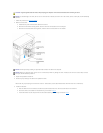
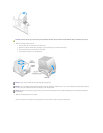
6. Check the jumper setting on the back of the second drive.
Ensure that the jumper setting on the new device is set for "cable select" (see the documentation that came with the drive for information).
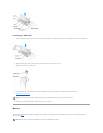
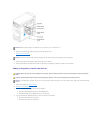
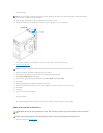
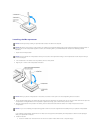
7. Install the additional hard drive:
a. Insert hard-drive securing screws.
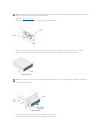
b. Place the two bracket tabs into the drive slots inside the computer's front panel.
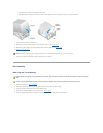
c. Swing the bracket forward so that it is flush with the computer's front panel.
d. Replace the bracket-securing screws.
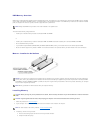
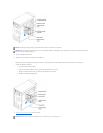
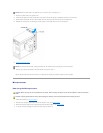
8. Reinstall the existing hard drive into the computer.
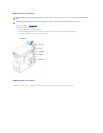
NOTICE: Ground yourself by touching an unpainted metal surface on the back of the computer.
NOTICE: When you unpack the drive, do not set it on a hard surface, which may damage the drive. Instead, set the drive on a soft surface, such as a
foam pad, that will sufficiently cushion it.
NOTICE: Match the colored strip on the cable with pin 1 on the drive (pin 1 is marked as "1").