


Removing and Installing Parts: Dell XPS 710 H2C Edition Service Manual
file:///C|/Preeji_working%20folder/Projects/E-Doc/Dimension%20and%20XPS/xps-710-h2c/SM/parts.htm[3/13/2013 11:45:23 AM]
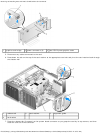
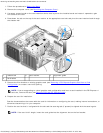
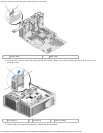
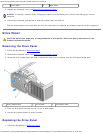
1 SATA data cable 2 SATA data connector (on the system board) 3 SATA drive
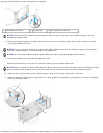
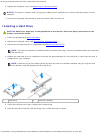
When you connect two IDE devices to a single IDE data cable and configure the devices for the cable select setting, the device
attached to the last connector on the data cable is primary or the boot device, and the device attached to the middle
connector on the data cable is the secondary device. See the drive documentation in your upgrade kit for information on
configuring devices for the cable select setting.
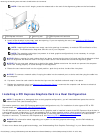
To connect an IDE data cable, align the tab on one connector with the notch on the other. When disconnecting an IDE data
cable, grasp the colored pull-tab and pull until the connector detaches.
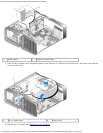
Hard Drive
Removing a Hard Drive
CAUTION: Before you begin any of the procedures in this section, follow the safety instructions in the
Product Information Guide.
CAUTION: To guard against electrical shock, always unplug your computer from the electrical outlet before
removing the cover.
NOTICE: If you are replacing a hard drive that contains data that you want to keep, back up your files before you
begin this procedure.
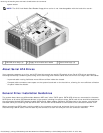
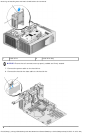
1. Follow the procedures in Before You Begin
.
2. Remove the computer cover (see Removing the Computer Cover
).
3. Disconnect the power cable and the data cable from the hard drive.