


Removing and Installing Parts: Dell XPS 710 H2C Edition Service Manual
file:///C|/Preeji_working%20folder/Projects/E-Doc/Dimension%20and%20XPS/xps-710-h2c/SM/parts.htm[3/13/2013 11:45:23 AM]
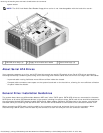
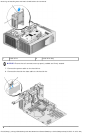
7. Replace the computer cover (see Replacing the Computer Cover).
NOTICE: To connect a network cable, first plug the cable into the network port or device and then plug it into the
computer.
8. Connect the computer and devices to electrical outlets, and turn them on.
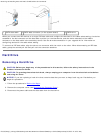
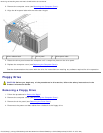
Installing a Floppy Drive
1. Follow the procedures in Before You Begin.
2. Remove the computer cover (see Removing the Computer Cover
).
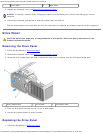
3. Remove the drive panel (see Removing the Drive Panel
).
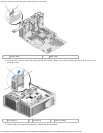
4. Remove the existing floppy drive, if applicable (see Removing a Floppy Drive
).
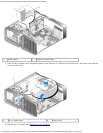
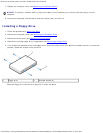
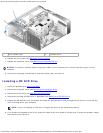
5. If no screws are attached to the new floppy drive, check the inside of the drive panel for shoulder screws. If screws are
present, attach the screws to the new drive.
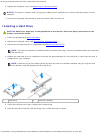
1 floppy drive 2 shoulder screws (4)
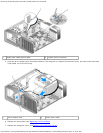
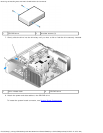
Slide the floppy drive into the drive bay until it clicks into place.