


Back to Contents Page
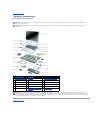
Processor Thermal-Cooling Assembly
Dell™Inspiron™9400ServiceManual
Removing the Processor Thermal-Cooling Assembly
Replacing the Processor Thermal-Cooling Assembly
Removing the Processor Thermal-Cooling Assembly
1. Follow the instructions in Before Working Inside Your Computer.
2. Remove the hinge cover (see Removing the Hinge Cover).
3. Remove the keyboard (see Keyboard).
4. Remove the display assembly (see Removing the Display Assembly).
5. Remove the palm rest (see Removing the Palm Rest).
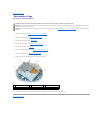
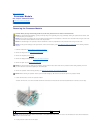
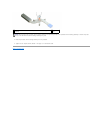
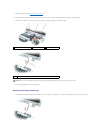
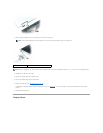
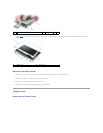
6. Loosen in consecutive order the four captive screws, labeled "1" through "4," that secure the processor thermal-cooling assembly to the system board.
7. Lift the processor thermal-cooling assembly and remove it from the system board.
Replacing the Processor Thermal-Cooling Assembly
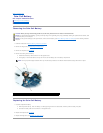
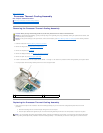
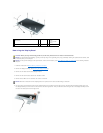
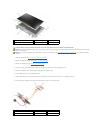
1. Place a new thermal pad on the underside of the thermal-cooling assembly (the part of the thermal- cooling assembly that will cover the new
processor):
a. Remove the backing from the new thermal pad, taking care not to tear the pad.
b. Place the pad's adhesive-side against the part of the thermal-cooling assembly that will cover the new processor, and press it into place.
CAUTION: Before you begin the following procedure, see the safety instructions in the Product Information Guide.
NOTICE: To avoid electrostatic discharge, ground yourself by using a wrist grounding strap or by periodically touching an unpainted metal surface (such
as the back panel) on the computer.
NOTICE: To help prevent damage to the system board, remove the main battery (see Before Working Inside Your Computer) before working inside the
computer.
1
processor thermal-cooling assembly
2
captive screws (4)
NOTE: If you are replacing the thermal-cooling assembly without removing and replacing a new processor, you can place the new thermal pad directly
on any existing thermal pad already installed on the thermal-cooling assembly. It is not necessary to remove an existing pad or to clean the surface.