


28 Setting Up for Local Printing
www.dell.com | support.dell.com
Using XP Professional x64 With a USB or Parallel
Cable
NOTE: Windows XP Professional requires that you have administrative access to install printer
drivers on your computer.
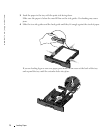
When you attached the cable and turned on the printer, the Found New Hardware Wizard
appeared on your computer screen.
1 Insert the Drivers and Utilities CD into your computer.
The Wizard automatically searches for an appropriate driver.
2 Scroll through the list of drivers until you see
D:\Drivers\Print\x64\dkaayb40.inf selected in the Location column (where D
is the drive letter of your CD).
3 Click Next.
The wizard copies all of the necessary files and installs the printer drivers.
4 Click Finish when the software is installed.
5 The Drivers and Utilities CD should launch the installation software automatically.
If the CD does not automatically launch, click Start→Run, type D:\setup.exe (where
D is the drive letter of your CD), and then click OK.
6 When the Drivers and Utilities CD screen appears, click Personal Installation - Install the
printer for use on this computer only to install the additional software for your printer.
7 Select your printer from the drop-down box.
8 Select Typical Installation (recommended), and then click Install.
When all of the files are installed on your computer, the Congratulations screen appears.
9 Click Print a Test Page to verify printer setup.
10 Click Finish to exit when the test page prints successfully.