Configuration: Disk Groups and Virtual Disks 107
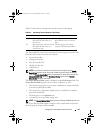
Table 9-1 shows how to interpret the security status of a disk group.
The Physical Disk Security menu is displayed in the Storage Array menu. The
Physical Disk Security menu has these options:
•Create Security Key
• Change Security Key
•Save Security Key File
•Validate Security Key
•Unlock Drives
NOTE: If you have not created a security key for the storage array, the Create
Security Key option is active. If you have created a security key for the storage
array, the Create Security Key option is inactive with a check mark to the left. The
Change Security Key option, the Save Security Key option, and the Validate
Security Key option are now active.
The Secure Physical Disks option is displayed in the Disk Group menu. The
Secure Physical Disks option is active if these conditions are true:
• The selected storage array is not security enabled but is comprised entirely
of security capable physical disks.
• The storage array contains no snapshot source virtual disks or snapshot
repository virtual disks.
• The disk group is in an
Optimal
state.
• A security key is set up for the storage array.
NOTE: The Secure Physical Disks option is inactive if these conditions are not true.
The Secure Physical Disks option is inactive with a check mark on the left if
the disk group is already security enabled.
Table 9-1. Interpreting Security Status of a Disk Group
Secure Security Capable - Yes Security Capable - No
Yes The disk group is composed of all
SED physical disks and is in a
Secure state.
Not applicable. Only SED
physical disks can be in a Secure
state.
No The disk group is composed of all
SED physical disks and is in a
Non-Secure state.
The disk group is not entirely
composed of SED physical disks.
book.book Page 107 Tuesday, September 27, 2011 3:25 PM


