


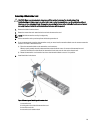
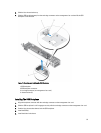

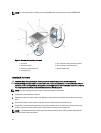
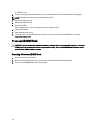


Figure 14. Removing and Installing a Heat Sink
1. heat sink
2. retention sockets (2)
3. retention screws (2)
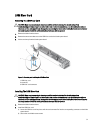
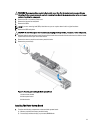
4. Use a clean, lint-free cloth to remove any thermal grease from the surface of the processor shield.
CAUTION: The processor is held in its socket under strong pressure. Be aware that the release lever can spring up
suddenly if not firmly grasped.
5. Position your thumb firmly over the processor socket-release lever and release the lever from the locked position.
Rotate the lever 90 degrees upward until the processor is released from the socket.
6. Use the tab on the processor shield to rotate the processor shield upward and out of the way.
7. If applicable, remove the socket protective cap from the processor shield. To remove the socket protective cap,
push the cap from the inside of the processor shield and move it away from the socket pins.
NOTE: It is recommended that you install/remove the socket protective cap from the processor shield with the
processor shield in the open position.
CAUTION: The socket pins are fragile and can be permanently damaged. Be careful not to bend the pins in the
socket when removing the processor out of the socket.
8. Lift the processor out of the socket and leave the release lever up so that the socket is ready for the new
processor.
CAUTION: If you are permanently removing a processor, you must install a socket protective cap and a processor/
DIMM blank in the vacant socket to ensure proper system cooling. The processor/DIMM blank covers the vacant
sockets for the DIMMs and the processor.
37