


15
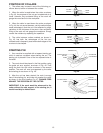
POSITION OF COLLARS
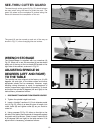
1. The collars may be used in any of the following po-
sitions: above, below or between two cutters.
2. When the collar is used below the cutter, as shown
in Fig. 43, the progress of the cut can be observed at all
times. However, any accidental lifting of the work will
gouge the wood and ruin the workpiece.
3. When the collar is used above the cutter as shown
in Fig. 44, the cut cannot be seen, yet this method offers
some advantage in that the cut is not affected by slight
variations in the thickness of the stock. Also accidental
lifting of the work will not gouge the workpiece. Simply
correct the mistake by repeating the operation.
4. The collar between cutters method, as shown in
Fig. 45, has both the advantages of the first two
methods and is frequently used where both edges of the
work are to be shaped.
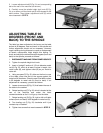
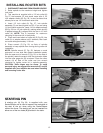
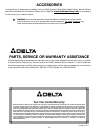
STARTING PIN
1. Your machine is supplied with a tapered starting pin
which is used as a support when starting the cut. The
starting pin is placed in one of the two tapered holes in
the table.
2. The work should be placed in the first position using
the guide pin as a support, as shown in Fig. 46. Then
swing the work into the cutter as shown in the second
position. The work will now be supported by the collar
and starting pin as shown in Fig. 46.
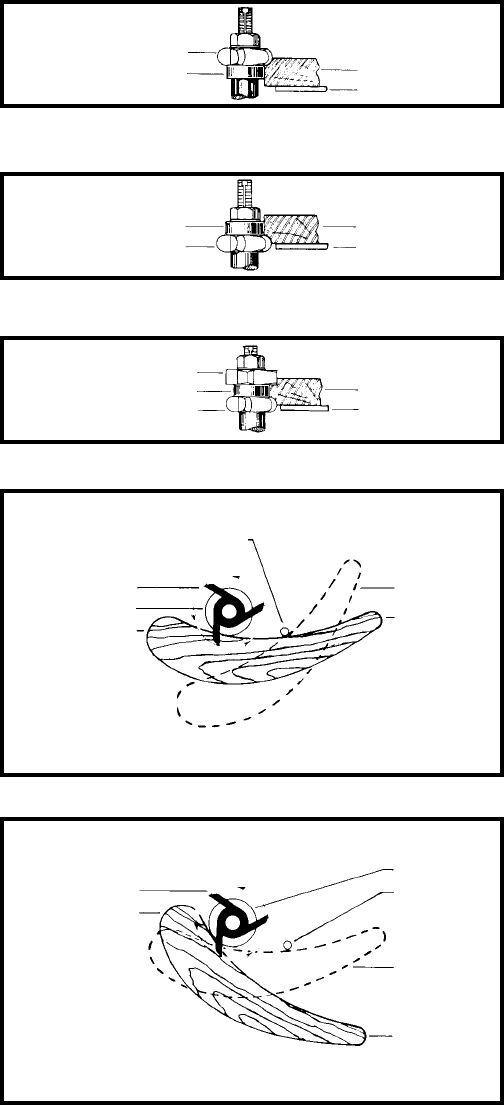
3. After the cut has been started, the work is swung
free of the starting pin, and rides only against the collar
as shown in the third position Fig. 47. ALWAYS FEED
AGAINST THE ROTATION OF THE CUTTER.
IMPORTANT: If the work would be advanced to the
cutter without the side support of the starting pin, it
would invariably be kicked back.
Fig. 43
Fig. 44
Fig. 45
Fig. 46
Fig. 47
CUTTER
COLLAR
WORK
TABLE
COLLAR
CUTTER
WORK
TABLE
CUTTER
CUTTER
COLLAR
WORK
TABLE
STARTING PIN
CUTTING CIRCLE
COLLAR
WORK
1st POSITION
2nd POSITION
COLLAR
STARTING PIN
2nd POSITION
3rd POSITION
CUTTING CIRCLE
WORK