


Dell PowerVault MD32xxi Configuration Guide for VMware ESX4.1 Server Software
Page 31
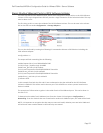
http://www.vmware.com/support/pubs/vs_pages/vsp_pubs_esxi41_e_vc41.html
Dell/VMware alliance home page:
http://www.dell.com/vmware
Appendix A
This appendix details an example of how to over commit the number of VMkernel ports to the physical NICs. This is
usually done in environments in which the NIC is capable of handling multiple sessions such as 10GbE. This can also
be done in larger environments combined with a PowerVault SAN to help achieve maximum bandwidth to the
SAN.
In this appendix example we are using 2 physical NICs and assigning 3 VMkernel ports to each one for a total of 6
sessions to the SAN.
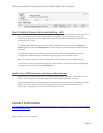
Step A1: Configure vSwitch and Enable Jumbo Frames
Follow the Step 1 configuration steps in the main document as there are no changes for adding multiple
VMkernel ports.
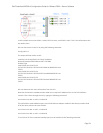
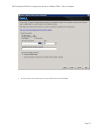
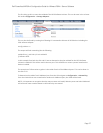
Step A2: Add iSCSI VMkernel Ports
The following command will add a new iSCSI VMkernel Port named iSCSI1 on the vSwitch created in the
previous step.
esxcfg-vswitch –A iSCSI1 vSwitch2
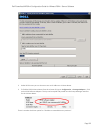
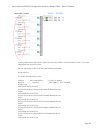
This next command will configure the IP Address, Subnet Mask and enable Jumbo Frame support for the
new VMkernel Port iSCSI1
esxcfg-vmknic –a –i 10.10.5.173 –n 255.255.255.0 –m 9000 iSCSI1
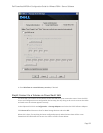
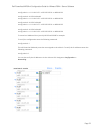
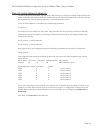
Following the example from before we are just adding more VMkernel ports. We need to create 5 more
VMkernel Ports named iSCSI2, iSCSI3, iSCSI4, iSCSI5 and iSCSI6. Then configure the IP addresses, subnet
masks and enable Jumbo Frames.
esxcfg-vswitch –A iSCSI2 vSwitch2
esxcfg-vmknic –a –i 10.10.5.174 –n 255.255.255.0 –m 9000 iSCSI2
esxcfg-vswitch –A iSCSI3 vSwitch2