


Dell PowerVault MD32xxi Configuration Guide for VMware ESX4.1 Server Software
Page 35
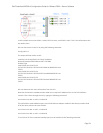
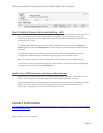
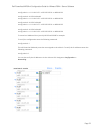
Switch Name Num Ports Used Ports Configured Ports MTU Uplinks
vSwitch2 64 9 64 9000 vmnic3,vmnic2
PortGroup Name VLAN ID Used Ports Uplinks
iSCSI6 0 1 vmnic2,vmnic3
iSCSI5 0 1 vmnic2,vmnic3
iSCSI4 0 1 vmnic2,vmnic3
iSCSI3 0 1 vmnic2,vmnic3
iSCSI2 0 1 vmnic2,vmnic3
iSCSI1 0 1 vmnic2,vmnic3
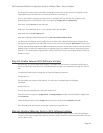
You can see that there are two vmnics in each uplink for each VMkernel Port. This is what we need to
change so that only a single vmnic is in each uplink and that we manually load balance them across all
available VMkernel Ports.
To configure this process via CLI first note the vmnic number of the NICs you want to remove and type the
following command:
esxcfg-vswitch –p iSCSI1 –N vmnic3 vSwitch2
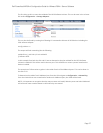
What this will do is remove vmnic3 from VMkernel port iSCSI1 so that just vmnic2 is on iSCSI1.
We then need to do the same thing for the other 4 VMkernel ports making sure to remove vmnics so that
an equal number of VMkernel ports are on each vmnic (3 per vmnic).
esxcfg-vswitch –p iSCSI2 –N vmnic3 vSwitch2
esxcfg-vswitch –p iSCSI3 –N vmnic3 vSwitch2
esxcfg-vswitch –p iSCSI4 –N vmnic2 vSwitch2
esxcfg-vswitch –p iSCSI5 –N vmnic2 vSwitch2
esxcfg-vswitch –p iSCSI6 –N vmnic2 vSwitch2
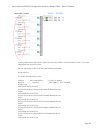
In an example where there are 3 or more vmnics, you would remove each one from the vSwitch to make
sure there is only a single vmnic per uplink.
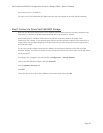
To verify that this was done correctly type the following command:
esxcfg-vswitch –l
The output will look similar to this:
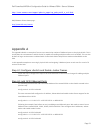
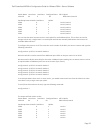
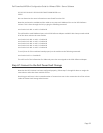
Switch Name Num Ports Used Ports Configured Ports MTU Uplinks
vSwitch2 64 9 64 9000 vmnic3,vmnic2
PortGroup Name VLAN ID Used Ports Uplinks
iSCSI6 0 1 vmnic3
iSCSI5 0 1 vmnic3
iSCSI4 0 1 vmnic3
iSCSI3 0 1 vmnic2
iSCSI2 0 1 vmnic2
iSCSI1 0 1 vmnic2