


5 Configuration D-Link Web Smart Switch User Manual
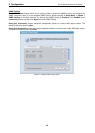
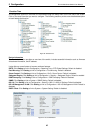
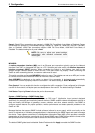
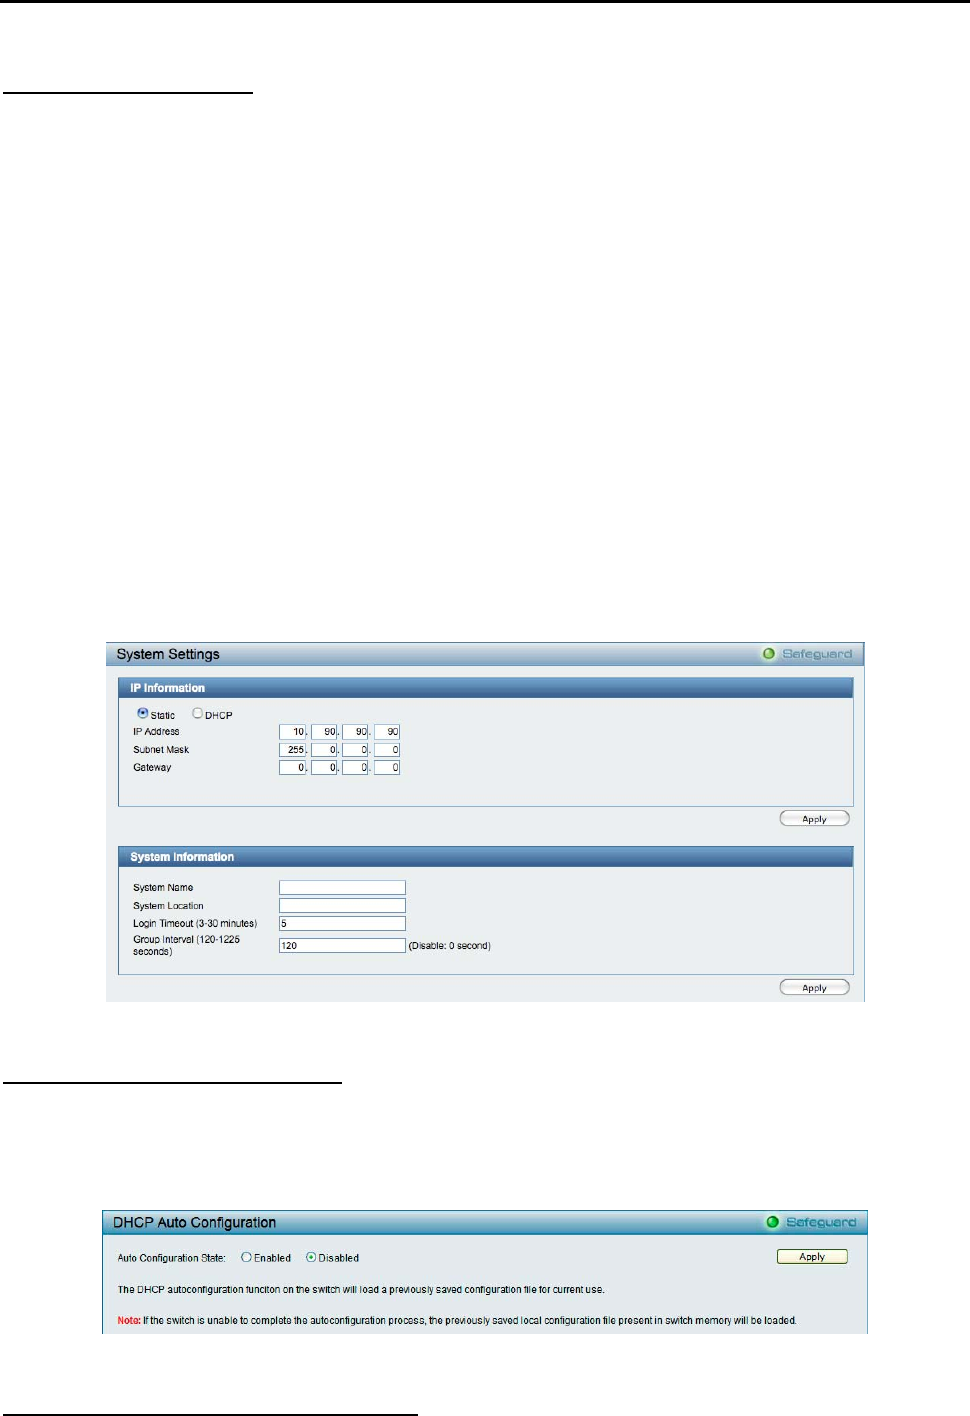
System > System Settings
The System Setting allows the user to configure the IP address and the basic system information of the
Switch.
IP Information: There are two ways for the switch to obtain an IP address: Static and DHCP (Dynamic Host
Configuration Protocol).
When using static mode, the IP Address, Subnet Mask and Gateway can be manually configured. When
using DHCP mode, the Switch will first look for a DHCP server to provide it with an IP address (including
network mask and default gateway) before using the default or previously entered settings. By default the IP
setting is static mode with IP address is 10.90.90.90 and subnet mask is 255.0.0.0.
System Information: By entering a System Name and System Location, the device can more easily be
recognized through the SmartConsole Utility and from other Web-Smart devices on the LAN.
Login Timeout: The Login Timeout controls the idle time-out period for security purposes, when there is no
action for a specific time span in the Web-based Management. If the current session times out (expires), the
user is required a re-login before using the Web-based Management again. Selective range is from 3 to 30
minutes, and the default setting is 5 minutes.
Group Interval: The D-Link Web Smart Switch will routinely send report packets to the SmartConsole Utility
in order to maintain the information integrity. The user can adjust the Group Interval to optimal frequency.
Selective range is from 120 to 1225 seconds, and 0 means disabling the reporting function.
Figure 45 – System > System Setting
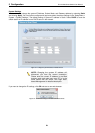
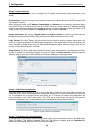
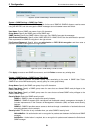
System > DHCP Auto Configuration
This page allows you to enable the DHCP Auto Configuration feature on the Switch. When enabled, the
Switch becomes a DHCP client and gets the configuration file from a TFTP server automatically on next boot
up. To accomplish this, the DHCP server must deliver the TFTP server IP address and configuration file
name information in the DHCP reply packet. The TFTP server must be up and running and store the
necessary configuration file in its base directory when the request is received from the Switch.
Figure 46 – System > DHCP Auto Configuration
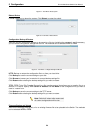
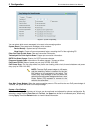
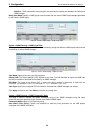
System > Trap Settings (For SmartConsole)
By configuring the Trap Setting, it allows SmartConsole Utility to monitor specified events on this Web-Smart
Switch. By default, Trap Setting is disabled. When the Trap Setting is enabled, enter the Destination IP
address of the managing station that will receive trap information.
28