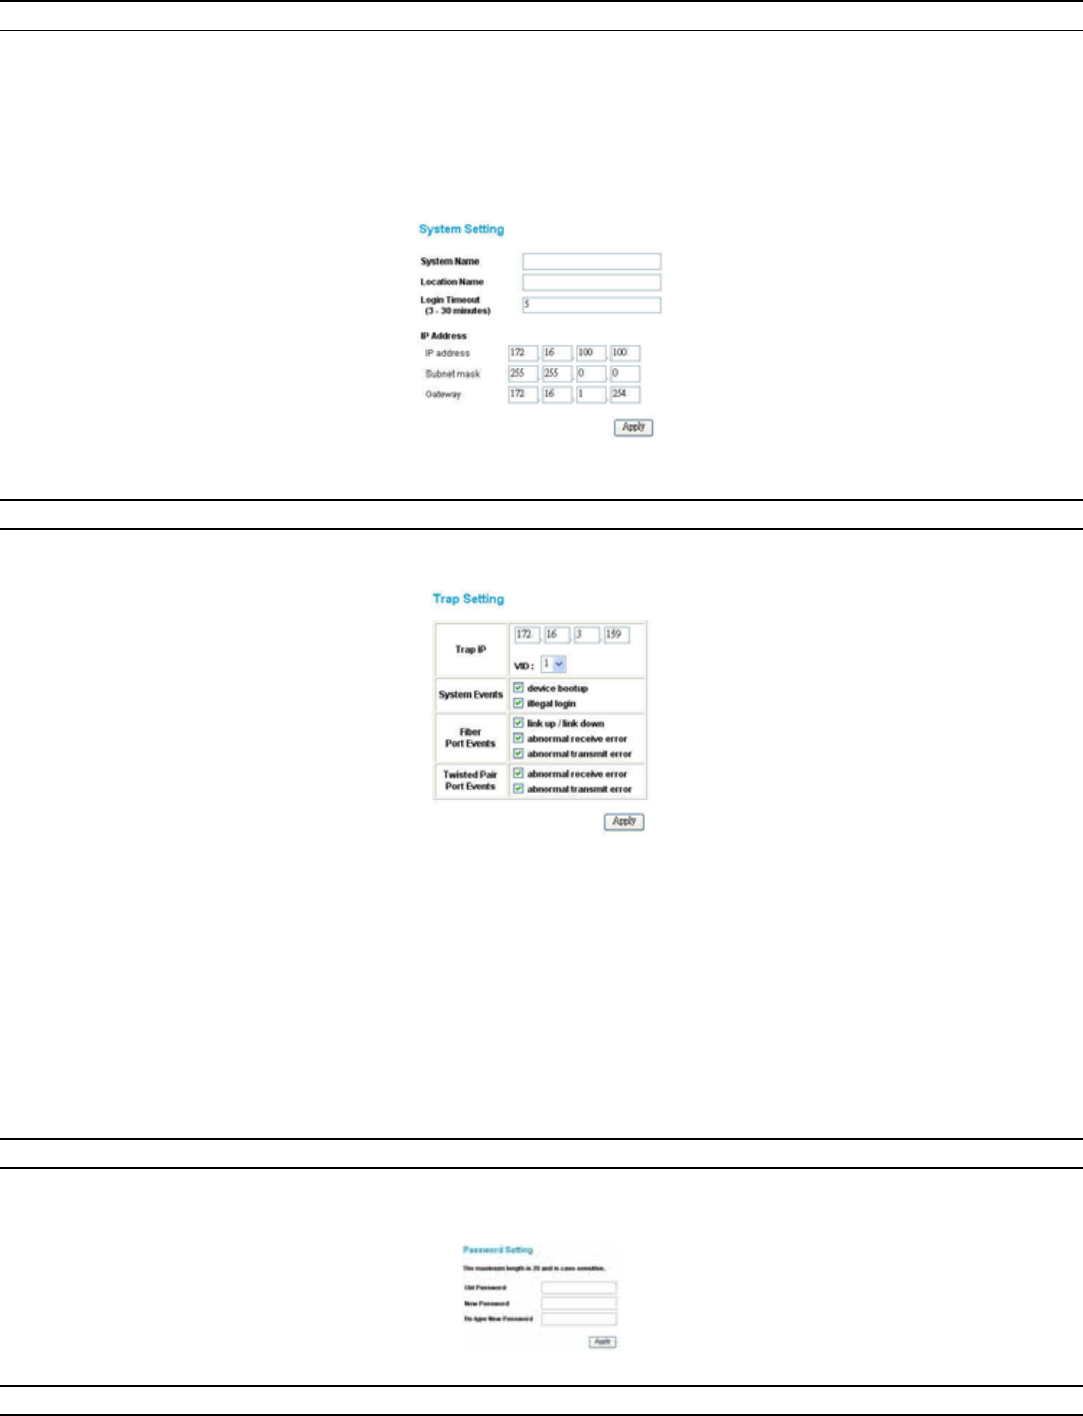
System Setting
The System Setting includes the System name, Location name, Login Timeout, IP Address, Subnet Mask, and Gateway. Through the Web Management Utility,
you can easily recognize the device by using the System Name and the Location Name.
The Login Timeout is used to set the idle time-out for security purposes. When there is no action while running the Web Smart Utility and the time is up, you
must re-login to Web Smart Utility before you set the Utility.
Fill in the IP Address, Subnet Mask, and Gateway for the device.
Figure 25.
Trap Setting
The Trap Setting enables the device to monitor the Trap through the Web Management Utility. Set the Trap IP Address of the manager where the trap is to be
sent.
Figure 26. Trap Setting
System Events: Monitoring the system’s trap.
Device Bootup: A trap when booting up the system.
Illegal Login: A trap when there is an incorrect password login, and it will record from where the IP logins in.
Fiber Port Events: Monitoring the Fiber port status.
Link Up/Link Down: A trap when linking status occurs in the fiber port.
Abnormal* Receive Error: A trap when there are receive data errors in fiber port.
Abnormal* Transmit Error: A trap when there are transmit data errors in fiber port.
Copper Port Events: Monitoring the copper port status.
Abnormal* Receive Error: A trap when there are receive data errors in copper port.
Abnormal* Transmit Error: A trap when there are transmit data errors in copper port.
Abnormal*: 50 error packet count within 10 seconds.
Set Password
Password is the invaluable tool for the manager to secure Web Management Switch. Use this function to change the password.
If you forget the password, press the “Reset” button in the rear panel of the Switch; the current setting includes VLAN, Port Setting… etc. will be lost and the
Switch will restore to the default setting.
Figure 27. Set Password
Backup Setting
The backup tools help you to backup the current setting of the Switch. Once you need to backup the setting, press the “Backup” button to save the setting.


