9
Rack-Mount UPS Conversion and Installation
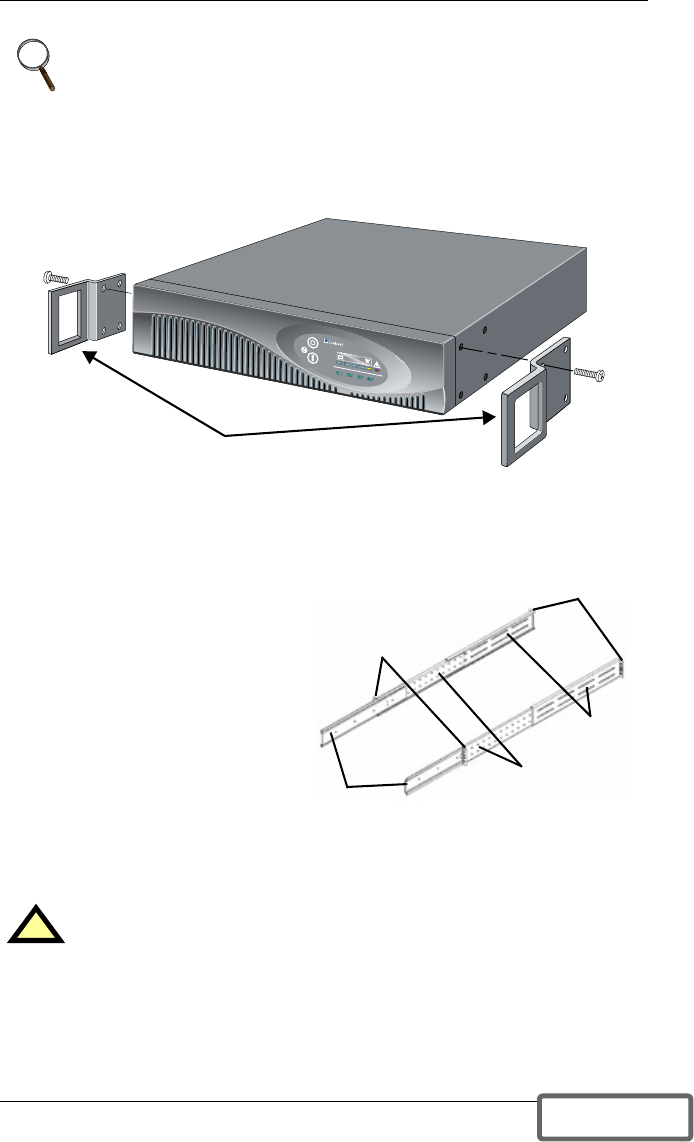
1. For slide rail installations, first remove the top/side fin. Slide the
top/side fin forward, then lift it up to remove. If desired, install the optional
rack mount handles that were shipped with the UPS.
Securing hardware and slide rails are sold separately. Contact your local
dealer or Liebert representative for these additional options and any assis-
tance needed.
2. Unpack the two (2) rack-mount-
ing bracket assemblies and
mounting hardware from the
rack-mounting kit
(P/N: RMKIT18-32). Bracket
assemblies are interchangeable
between left-hand or right-hand.
Remove inner member of each
bracket assembly as shown at
right by extending it to its outer-
most position, depressing the
retaining latch and then pulling
inner member from bracket
assembly.
3. Determine the height position
inside the rack enclosure where you want to mount the UPS or battery cab-
inet.
NOTE
When rack mounted, the UPS must be supported by a shelf, brackets
or slide rails on each side. The rack mount handles WILL NOT
support the weight of the UPS. They are used to move the UPS into
and out of the rack.
!
CAUTION
Reduce risk of tipping the rack enclosure by placing UPS or
battery cabinet in the lowest possible rack position.
+
–
AC INPUT BATTERY UPS ONBYPASS
UPStation GXT
Optional rack mount handles
Return
flanges
Inner
members
Retaining
latches
Front
members
Rear
members
DISCONTINUED
PRODUCT


