


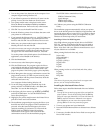

4. Make sure paper is loaded in the printer; then click the
Preview
button to print a preview of all available
calibration patterns. Use these pages to select the patterns
that need to be calibrated.
Note:
If you want to stop printing the preview patterns, press
Pause
and then turn off the printer using the
Operate
button.
5. For example, if the lines shown under Pattern 2 need to
be aligned, highlight
Pattern 2
in the Choose Pattern
pop-up menu and then click
Start
.
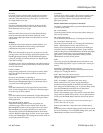
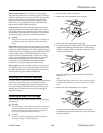
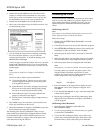
Wait while the printer prints a page containing multiple
patterns of vertical lines, each assigned with an offset
value. In most patterns, the vertical lines are slightly
misaligned. Look for the pattern that is most closely
aligned.
||
| |
Aligned Not-aligned
6. Enter the offset value of the pattern that is most closely
aligned in the
No.
box and click
OK
. Wait for the printer
to print the pattern Confirming Alignment Sheet for the
offset value you entered.
7. Repeat steps 5 and 6 for each of the patterns that need to be
aligned.
8. When you finish, click
Quit
.
9. A dialog box opens reminding you to save the new settings
by turning the printer off using the
Operate
button.
Settings will not be saved if you turn off the power to the
printer with a wall switch or from a power strip.
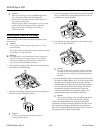
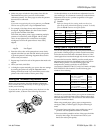
Setting the Thickness Adjustment Lever
Before you start printing, check the thickness adjustment
lever to make sure it is set correctly for the type of paper or
media you are loading.
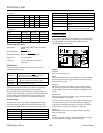
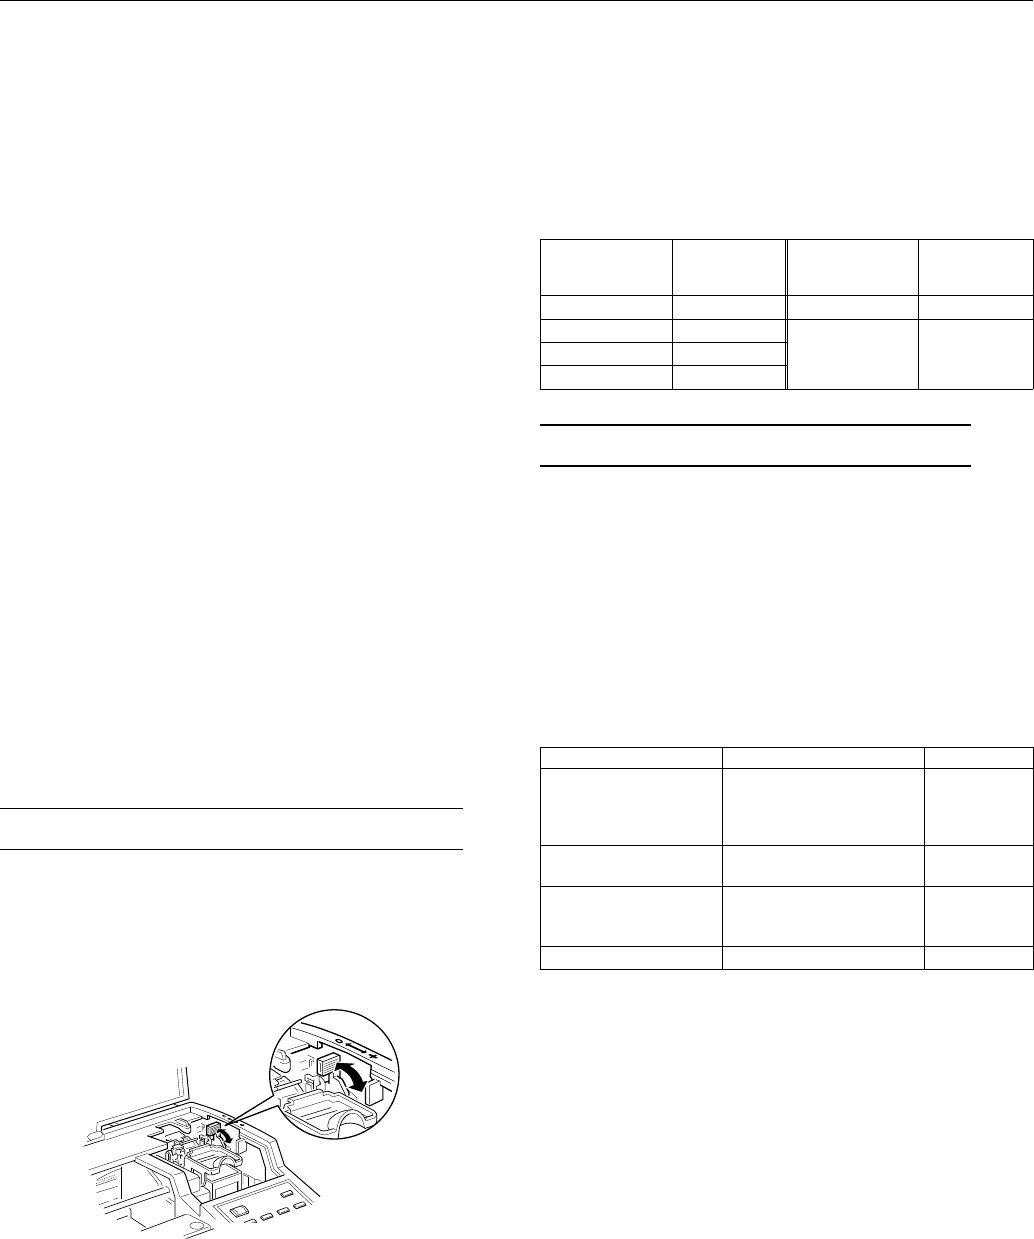
To access the lever, open the printer cover; the lever is in the
right back corner, as shown in the following illustration.
Use the table below to set the thickness adjustment lever for
your media type. If a document is smeared, set the thickness
adjustment lever to the + position (regardless of the paper
type) and print it again.
c
Caution:
Before you change the lever setting, make sure there is no
paper in the paper path and that printing is paused. To do this,
press the
Pause
button or turn off the printer.
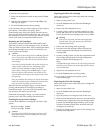
Media type
Thickness
adjustment
lever position Media type
Thickness
adjustment
lever position
Standard paper
0
Envelopes
+
Transparency film
0
Previously
smeared
documents
+
Labels
0
Continuous paper
0
Using Special Paper and Other Media
You can use most plain paper with your printer and achieve
good results. Coated papers give better results because they
reduce the amount of ink that is absorbed. However, if the
coated paper does not absorb enough ink, the ink can smear.
To ensure the best results, EPSON provides coated papers
and transparencies that are formulated for the inks used in
EPSON ink jet printers. To order EPSON papers and
transparencies, contact your dealer or call EPSON
Accessories at (800) 873-7766 (U.S. only). In Canada, call (800)
BUY-EPSON for sales locations. Use the following part
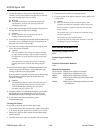
numbers when ordering:
Paper or other media Size Part number
Coated paper for 720 dpi Letter (8.5 × 11 inches)
Legal (8.5
× 14 inches)
B (11
× 17 inches)
Super A3/B (13
× 19 inches)
S041062
S041067
S041069
S041070
Coated paper for 360 dpi Letter (8.5
× 11 inches)
Super A3/B (13
× 19 inches)
S041060
S041066
High-quality glossy paper Letter (8.5
× 11 inches)
B (11
× 17 inches)
Super A3/B (13
× 19 inches)
S041072
S041074
S041075
Transparency film Letter (8.5
× 11 inches) S041064
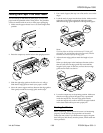
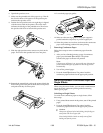
The built-in tractor feeder allows you to print on continuous
paper up to 17 inches (432 mm) wide or banner paper up to
16 inches (406 mm) wide. You can also use the tractor feeder
to print on continuous labels.
When using coated paper, glossy paper, transparencies,
envelopes, labels, or banner paper, keep the following in
mind:
❏
Use coated paper and glossy paper within one year of
purchase. Use transparencies within six months.
❏
Do not touch the printable surface of the paper; hold the
sheets by their edges. The moisture and oils on your
hands can reduce print quality.
EPSON Stylus 1500
Ink Jet Printers 1/96 EPSON Stylus 1500 - 13