


Skip over perforation.
Selects whether or not the printer
skips over the perforations of continuous paper, providing a
1-inch margin between the last line printed on one page and
the first line printed on the next. Because most software
programs set their own top and bottom margins, use this
feature only if your program does not provide them. This
feature does not affect single-sheet paper.
Auto tear off.
When using continuous paper, advances the
paper perforation to the tear-off position where you can easily
tear off the printed pages. When the printer receives data, it
automatically reverses the paper to the top-of-form position
and starts printing, so you can use all of the next sheet.
c
Caution:
When you use the tractor to print on labels, set this feature to
off. Otherwise labels may come off the backing and jam the
printer.
Print mode.
Selects the paper type you plan to use. Use this
feature to select paper types only when printing from a DOS
application. Select Plain paper (true black) when printing text
on plain paper. Select Plain paper (composite black) for color
images on plain paper or when the black ink in a printed
image is blurred. (Composite black is produced by mixing
cyan, magenta, and yellow inks.) Select Exclusive paper for
coated paper and high-quality glossy paper. Select
Transparency when printing on transparencies. When
Transparency is selected, printing is unidirectional.
Banner paper.
Specifies that banner paper is not recognized
as single-sheet paper even if the paper-release lever is set to
the single-sheet position. Paper is not ejected and advanced
forward to the next page with the
LF/FF
button.
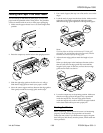
Removing the Protective Materials
You must remove all protective materials packed around and
inside your printer before you set it up and turn on the
power. Save all packaging and protective materials in case
you need to transport the printer in the future. The printer
should always be transported in its original packaging or
equivalent materials.
Installing the Black Ink Cartridge
Follow the steps in this section to install your printer’s black
ink cartridge.
w
Warning:
The ink cartridge is a self-contained unit. Under ordinary use,
ink will not leak from a cartridge. If ink gets on your hands,
wash them thoroughly with soap and water. If ink gets into
your eyes, flush them immediately with water.
c
Caution:
Do not open the ink cartridge package until just before you
install the cartridge, or the ink may dry up.
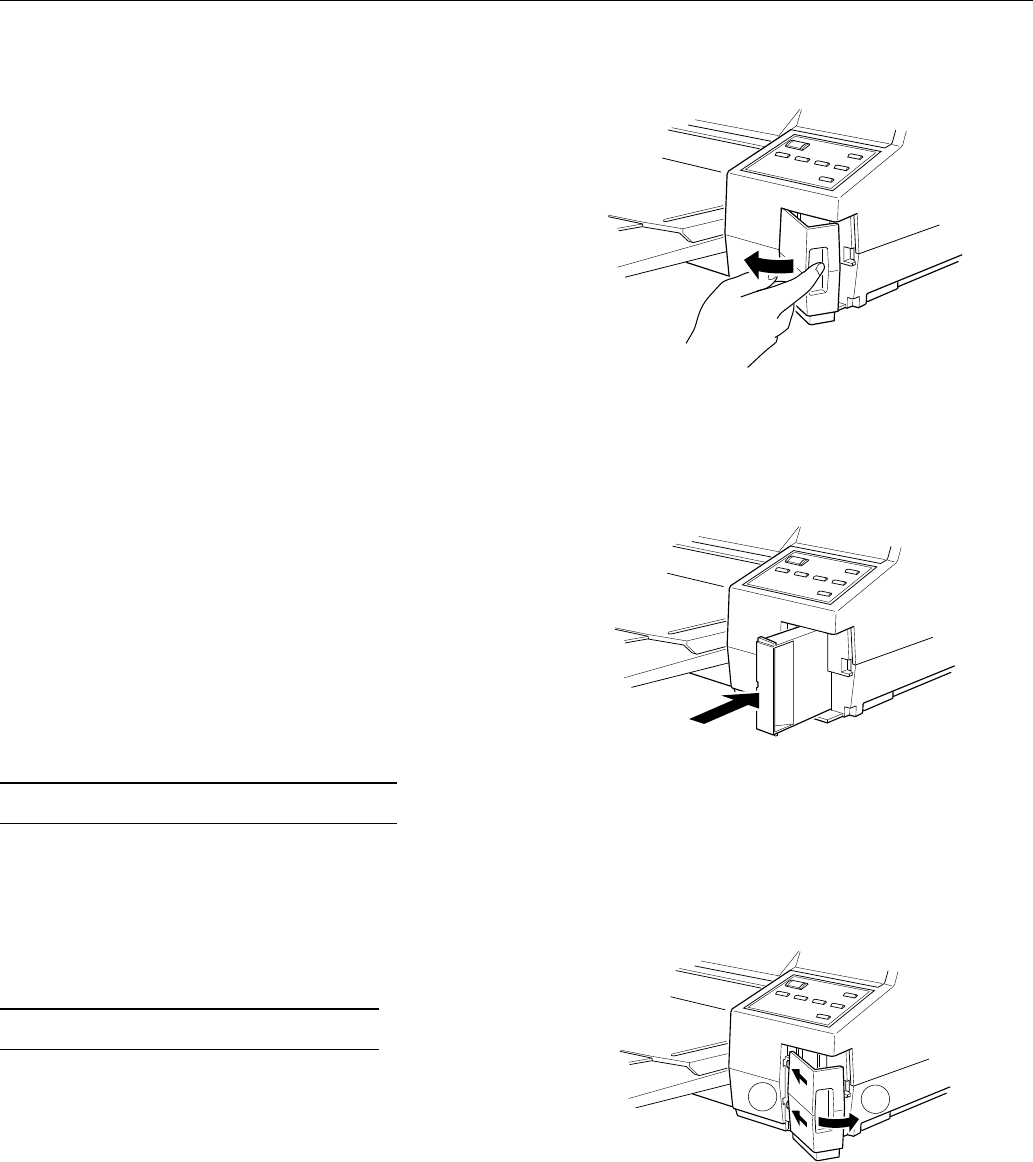
1. Make sure the printer is turned on.
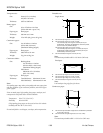
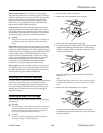
2. Remove the ink compartment cover as shown.
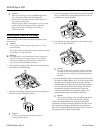
3. Remove the ink cartridge from its package.
4. Insert the end of the cartridge with the foil plug into the ink
compartment following the instructions on the cartridge.
Push the cartridge all the way into the compartment. You
will feel some resistance.
When the cartridge is correctly installed, the
Ink Out
O
light goes off.
Note:
If the
Ink Out
O
light remains on, the ink cartridge may not be
installed correctly. Remove it and then reinsert it as described
above.
5. Reattach the ink compartment cover as shown.
The first time you install the ink cartridge, the printer
automatically charges the ink delivery system. This takes
about two minutes.
1
2
EPSON Stylus 1500
Ink Jet Printers 1/96 EPSON Stylus 1500 - 7