


Epson PowerLite Cinema 200 Projector
6 - Epson PowerLite Cinema 200 Projector 1/04
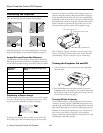
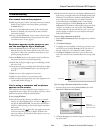
Performing Keystone Correction
If the projected image looks like or , use the Keystone
function to correct its shape.
Note: If the image is shaped like or , the projector has been
placed off to the side of the screen and angled toward it. Face the
projector straight ahead (instead of at the center of the screen), then
use the horizontal lens shift knob to center the image.
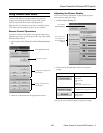
To perform keystone correction:
1. Press the
Menu button on the remote control.
2. Use the menu navigation buttons to open the
Setting menu,
then open the
Screen menu and select Keystone.
3. Use the arrow buttons to adjust the shape of the image.
4. Press the
Menu button when done.
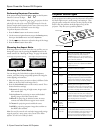
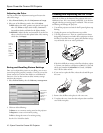
Choosing the Aspect Ratio
If the image doesn’t fit on the screen the way you like, you can
change the aspect ratio by pressing the
Aspect button on the
remote control. See “Resizing the Image” on page 2 for details.
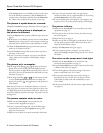
Choosing the Color Mode
You can change the Color Mode to adjust the brightness,
contrast, and color, letting you quickly optimize the image for
various lighting environments.
1. Select the image source you want to adjust (a different Color
Mode can be saved with each image source).
2. Press the
Color Mode button on the remote control. Then
choose from these settings:
❏
Dynamic for projecting in bright rooms; images retain
their natural color.
❏
Living Room for projecting in rooms with subdued
lighting; images retain their natural color.
❏
Natural for projecting in darkened rooms; increases
contrast and makes flesh tones appear more natural.
❏
Theatre for projecting movies with dark scenes.
❏
sRGB for projecting computer images that conform to
the sRGB color standard.
Note: You can fine-tune the color and other image quality settings
using the projector’s menu system or the Cinema Color Editor
software. See the User’s Guide for details.
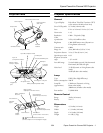
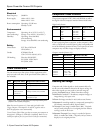
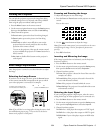
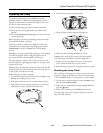
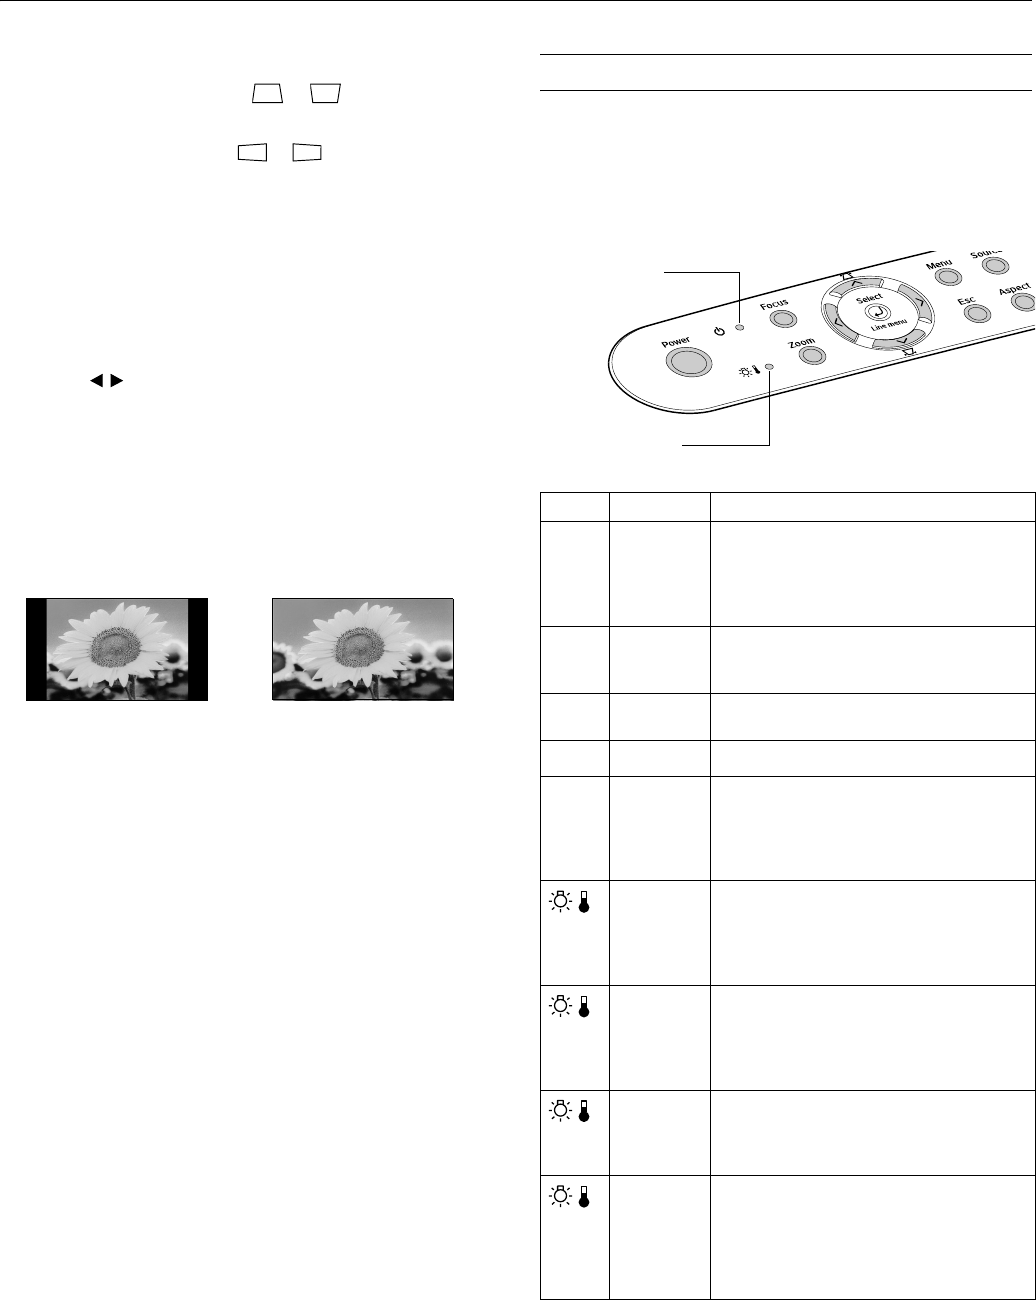
Projector Status Lights
If your projector isn’t working correctly, first turn it off, wait for
the Power light to turn a steady orange, and unplug it. Then
plug the power cord back in and turn on the projector. If this
doesn’t solve the problem, check the lights on top of the
projector. They alert you to possible problems.
4:3 image using Normal setting 16:9 image using Zoom setting
Light Status Action
P
off Make sure the power cable is connected
securely at both ends, then press the
P Power button to turn on the projector. If
you’ve just replaced the lamp, make sure the
cover is securely fastened.
P
orange The projector is in standby mode. You can
unplug it to turn it off or press the P Power
button to turn it on.
P
flashing
green
The projector is warming up. Wait about 30
seconds for a picture to appear.
P
green The projector is operating normally.
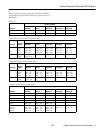
P
flashing
orange
You’ve turned off the projector and it’s cooling
down. Wait until the light stops flashing, then
unplug the projector (or press the P Power
button to turn it back on). Never unplug the
projector when the light is flashing orange.
flashing
orange
High-speed cooling is in progress. If the
projector gets too hot again, it turns off
automatically. Make sure nothing is blocking
the air filter. If it continues to overheat, clean
the air filter; see page 10 for instructions.
red The projector is too hot and the lamp has
turned off. Wait 5 minutes, then unplug the
projector. Make sure nothing is blocking the air
filter. If it continues to overheat, clean the air
filter; see page 10 for instructions.
flashing red
at half-
second
intervals
The lamp needs to be replaced. See page 11
for instructions.
flashing red
at 1-second
intervals
If you just replaced the lamp, the lamp cover
may be loose; fasten it securely. Or there may
be an internal problem with the projector. Turn
it off, wait for the P power light to stop
flashing, then unplug the projector from the
electrical outlet and contact Epson for help.
Power light
Warning light