


EPSON Stylus Scan 2500
9/99 EPSON Stylus Scan 2500
- 8
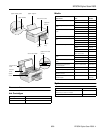
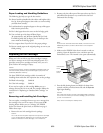
Paper Loading and Handling Guidelines
The following tips help you get the best results:
❏ Always load the printable side (the whiter and brighter side)
face up. Some special papers come with a cut corner to help
you load them correctly.
❏ Load letterhead or preprinted paper so the top of the paper
feeds into the printer first.
❏ Don’t load paper above the arrow on the left edge guide.
❏ You can load up to 20 sheets of Photo Paper,
30 transparencies, and 30 Photo Quality Ink Jet Cards.
For Photo Quality Ink Jet Paper, you can load up to the
arrow mark on the left edge guide.
❏ Use a support sheet if you find it in the paper package.
❏ Return unused paper to the original package as soon as you
finish printing.
Replacing an Ink Cartridge
When you’re low on ink or one of the cartridges is empty,
you’ll see a message on the LCD status display panel. It’s a
good idea to keep new cartridges on hand, since you can’t
print if either ink cartridge is empty.
Caution:
To ensure good results, use genuine EPSON cartridges and do not
refill them. Other products may cause damage to your printer not
covered by EPSON’s warranty.
Use these EPSON ink cartridges within six months of
installing them and before the expiration date on the package:
❏ Black ink cartridge: S020189
❏ Color ink cartridge: S020191
If you need to replace an ink cartridge before you see a
message (because the ink is too old, for example) follow the
instructions in “Replacing an Outdated Ink Cartridge” on
page 9.
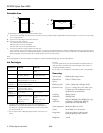
Removing and Installing Ink Cartridges
You can replace a cartridge whenever you see a message that
the cartridge is low on ink or empty. (If you press the
R
cleaning button before you see a message, the EPSON
Stylus Scan cleans the print head, as described on page 9.
Follow these steps:
1. Remove the new ink cartridge from its package.
Caution:
You must remove the yellow tape from the top of the cartridge
or you will permanently damage it. Do not remove the clear
seal from the bottom of the cartridge, or ink will leak out.
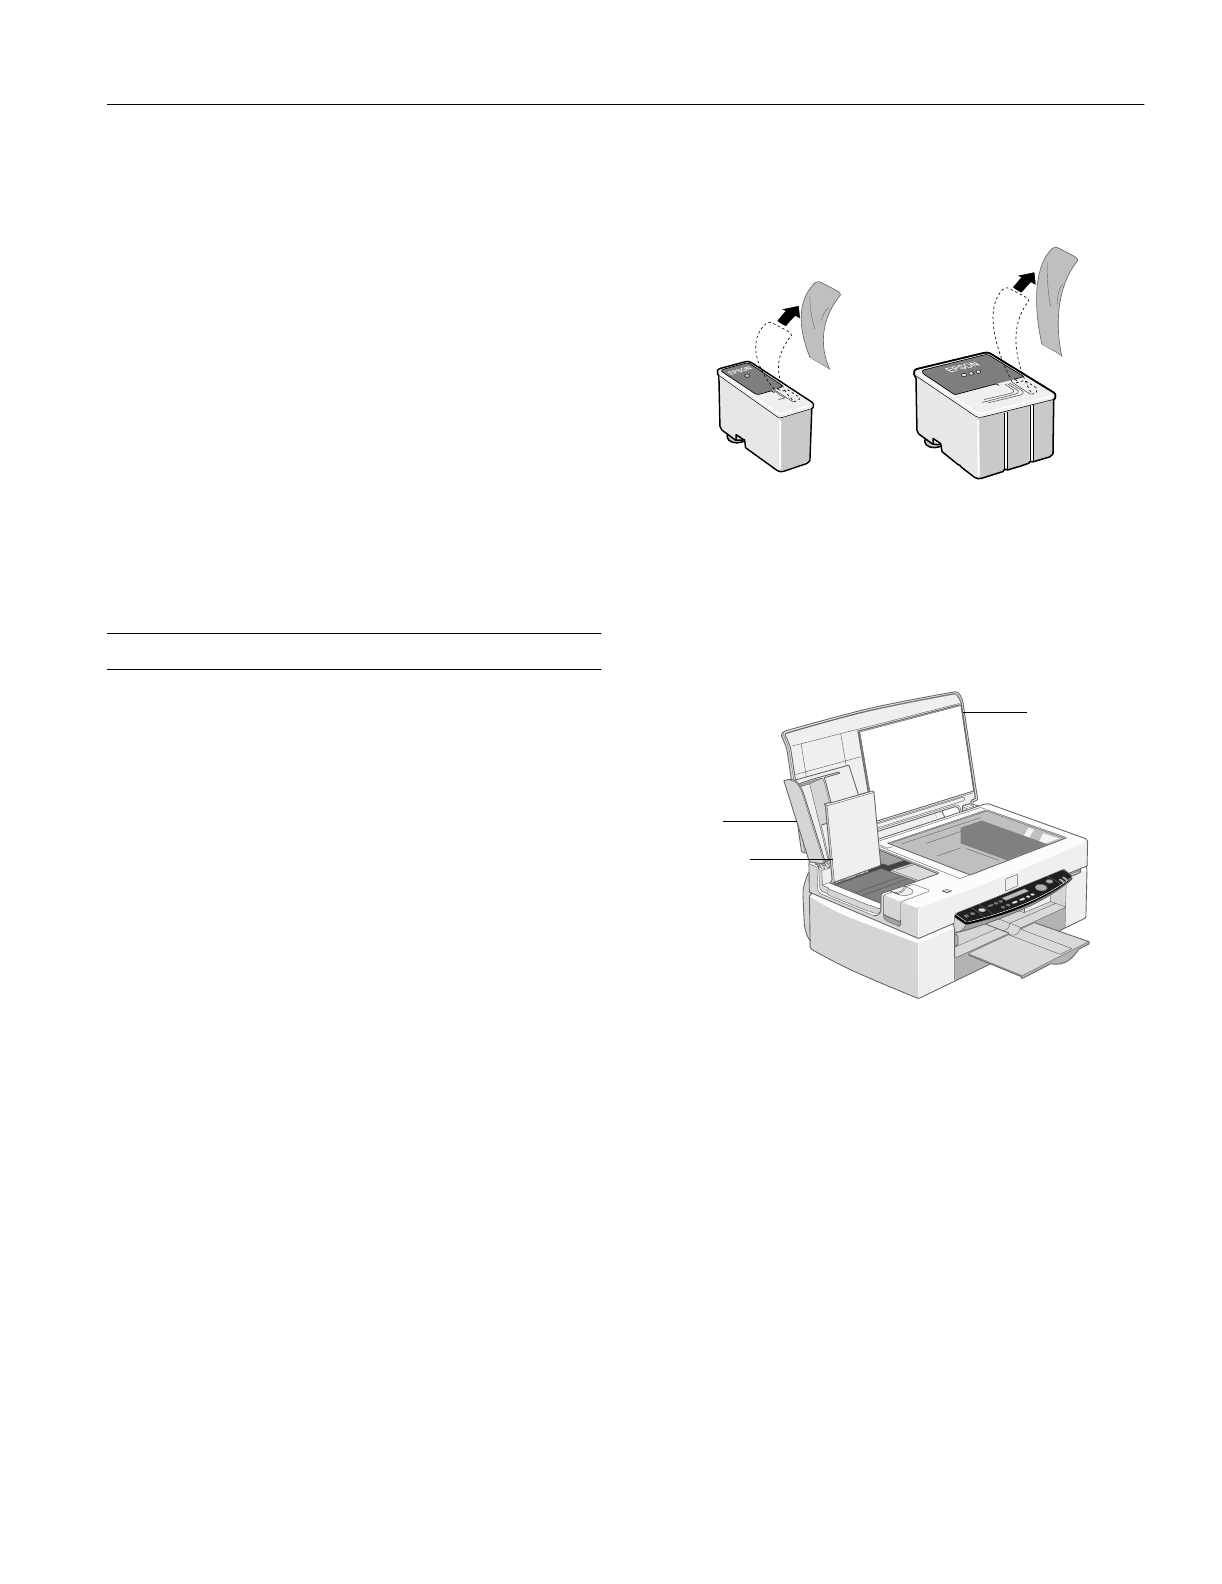
2. Remove only the yellow part of the tape seal on top. Don’t
pull off the blue portion or try to remove the clear seal
underneath the cartridge.
Note:
If you have an automatic document feeder, remove it from the
EPSON Stylus Scan, but don’t disconnect it from the option
interface.
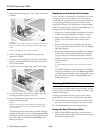
3. Make sure the EPSON Stylus Scan is turned on and not
printing. Open the document cover, and then open the
maintenance cover. The internal cover opens automatically.
4. Press the
R cleaning button and hold it for about three
seconds until the print head moves left and the
Operate
light begins flashing.
Caution:
Don’t open the clamp or remove a cartridge except to replace it
with a new one. Once you remove a cartridge, you can’t reuse
it, even if it contains ink.
Also, never move the print head by hand.
maintenance
cover
document
cover
internal
cover