EPSON Stylus Scan 2500
9 -
EPSON Stylus Scan 2500
9/99
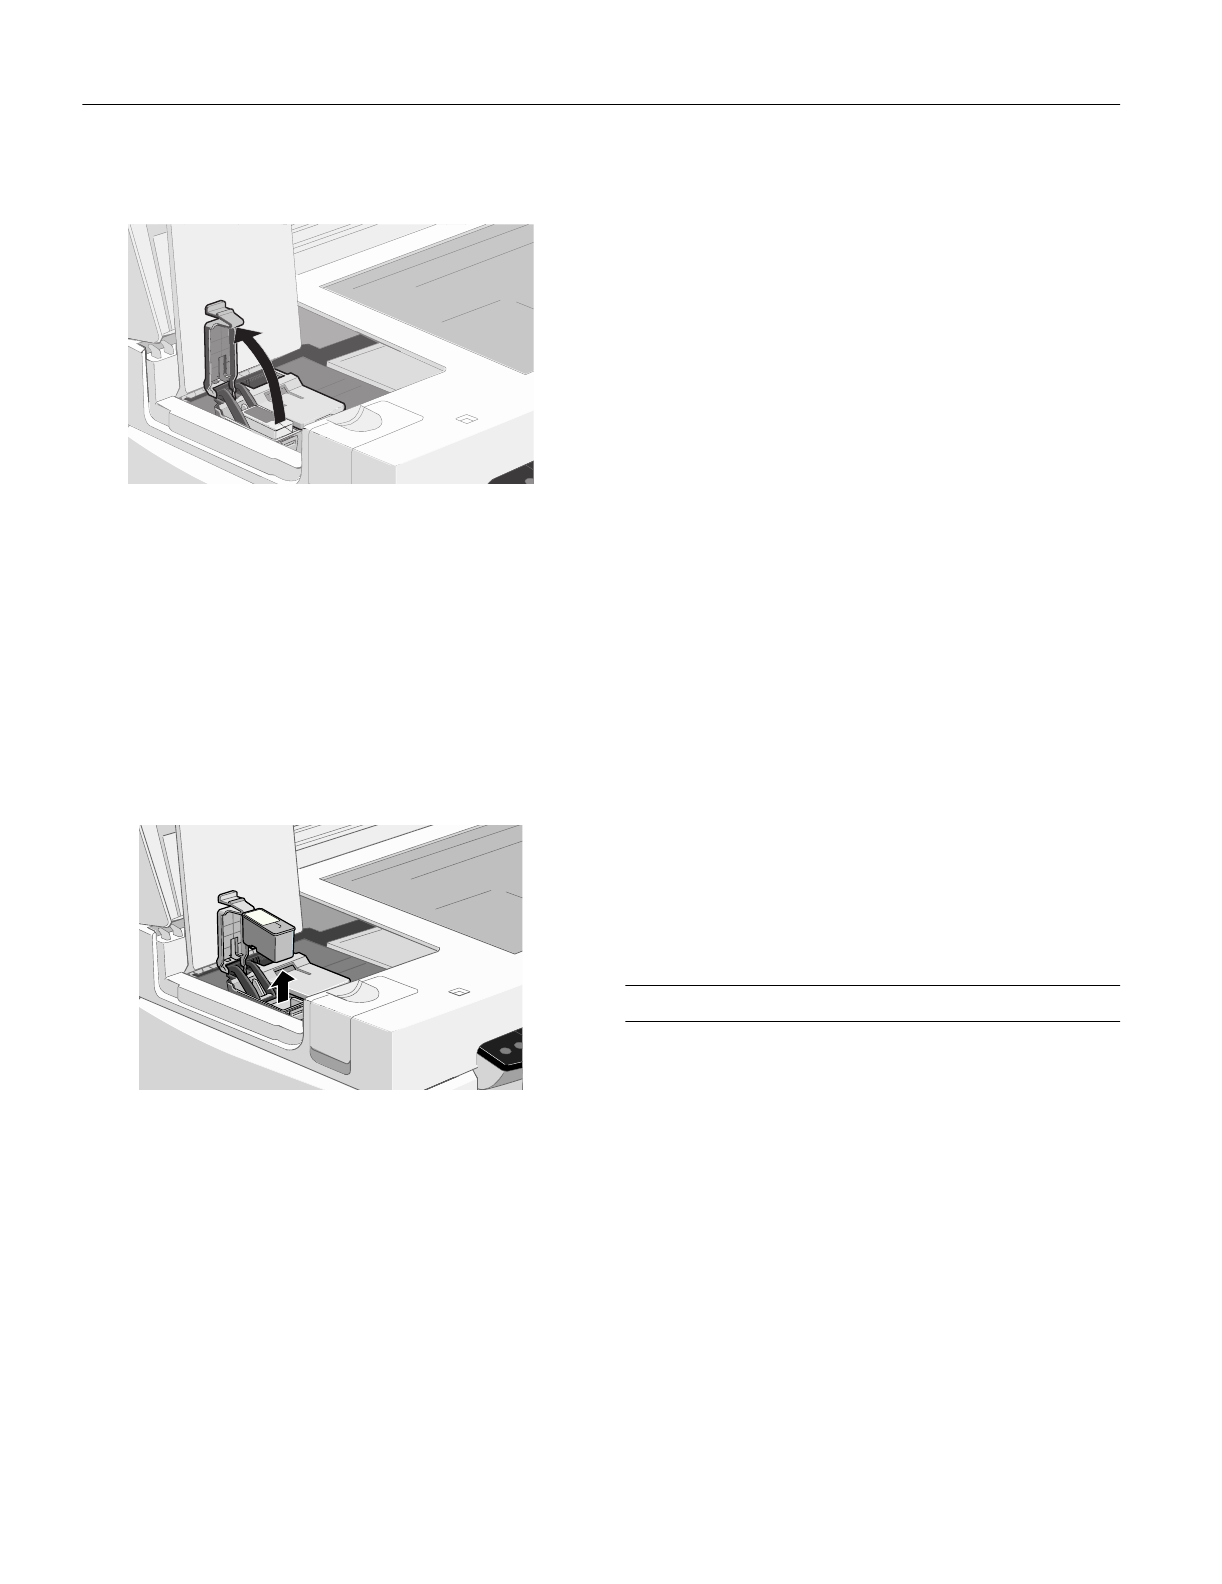
5. Pull up the ink cartridge clamp. The cartridge rises up from
its holder.
Warning:
If ink gets on your hands, wash them thoroughly with soap and
water. If ink gets into your eyes, flush them immediately with
water.
Keep ink cartridges out of the reach of children.
6. Lift the cartridge out of the EPSON Stylus Scan and
dispose of it carefully.
7. Lower the new ink cartridge into its holder with the label
facing up and toward the back of the printer. Don’t press
down on the cartridge.
8. Press down the ink cartridge clamp until it locks in place.
9. If you need to replace the other ink cartridge, repeat the
preceding steps before going on to step 10.
10. Close the maintenance and document covers, and then
press the
R cleaning button.
Caution:
Never turn off the printer while the Operate light is flashing,
unless the printer hasn’t moved or made any noise for more
than five minutes.
The EPSON Stylus Scan moves the print head and begins
charging the ink delivery system. The
Operate
light flashes
and the printer makes various sounds. Charging takes about
60 seconds. When it’s finished, the
Operate
light stops
flashing and stays on.
Replacing an Outdated Ink Cartridge
Even if you don’t see a message that a cartridge is low on ink
or empty, you may need to replace it if it’s more than six
months old. If your printouts don’t look as good as they used
to, try cleaning and aligning the print head first. If print
quality doesn’t improve, try replacing one or both cartridges.
Follow these steps to replace an ink cartridge before you see a
message on the LCD status display panel:
1. Prepare your new ink cartridge for installation as described
in “Removing and Installing Ink Cartridges” on page 8.
2. Make sure the EPSON Stylus Scan is turned on and not
printing. Then open the document and maintenance
covers.
3. Press the
E load/eject button and hold it down for about
three seconds until the print head moves left. The
Operate
light begins flashing.
4. Remove the old ink cartridge and install the new cartridge
as described in “Removing and Installing Ink Cartridges”
on page 8. Don’t press the
R cleaning button, however.
5. Close the maintenance and document covers and press the
E load/eject button.
Caution:
To avoid damaging the printer, never move the print head by
hand.
The EPSON Stylus Scan moves the print head and begins
charging the ink delivery system. The
Operate
light flashes
and the printer makes various sounds. Charging takes about
60 seconds. When it’s finished, the
Operate
light stops
flashing and stays on.
Cleaning the Print Head
If your printouts are light or have gaps in the image, you may
need to clean the print head. This unclogs the nozzles so they
can deliver ink properly.
Cleaning the print head uses ink, so clean it only if print
quality declines. You can clean the print head using either:
❏ The Head Cleaning utility in your printer software (with
the printer connected to a local port, not over a network)
❏ The EPSON Stylus Scan’s control panel buttons.
Using the Head Cleaning Utility
1. Make sure the EPSON Stylus Scan is turned on but not
printing. Also, make sure that there’s no ink out message on
the LCD status display panel.
